 Sign In / Sign Up
 Orders
 Product Keys
 Downloads

 Go to notfound
Installing Windows 7 in VirtualBox Step-by-Step
Begin your VirtualBox installation journey with the following instructions:
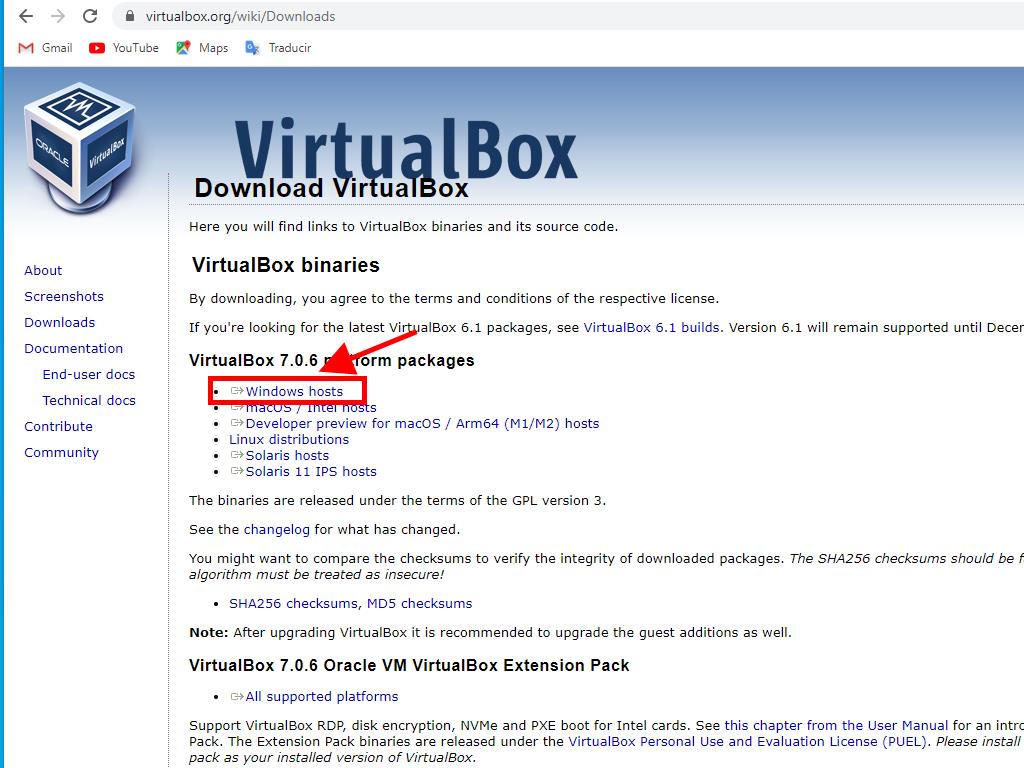
- Navigate to this page and choose the Windows Hosts from the selection.
- The download of the VirtualBox installer will commence shortly.
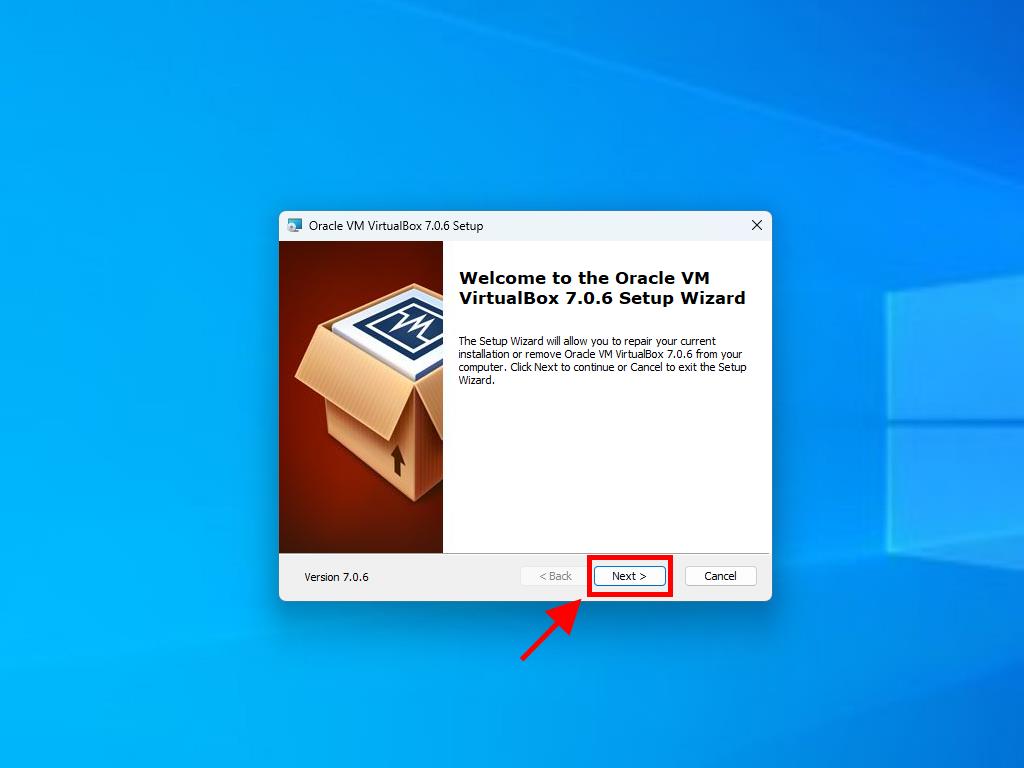
- Proceed to launch the downloaded installer and select Next to continue.
If installation issues arise, opt out of USB feature selections.
Setting up a new virtual environment follows:
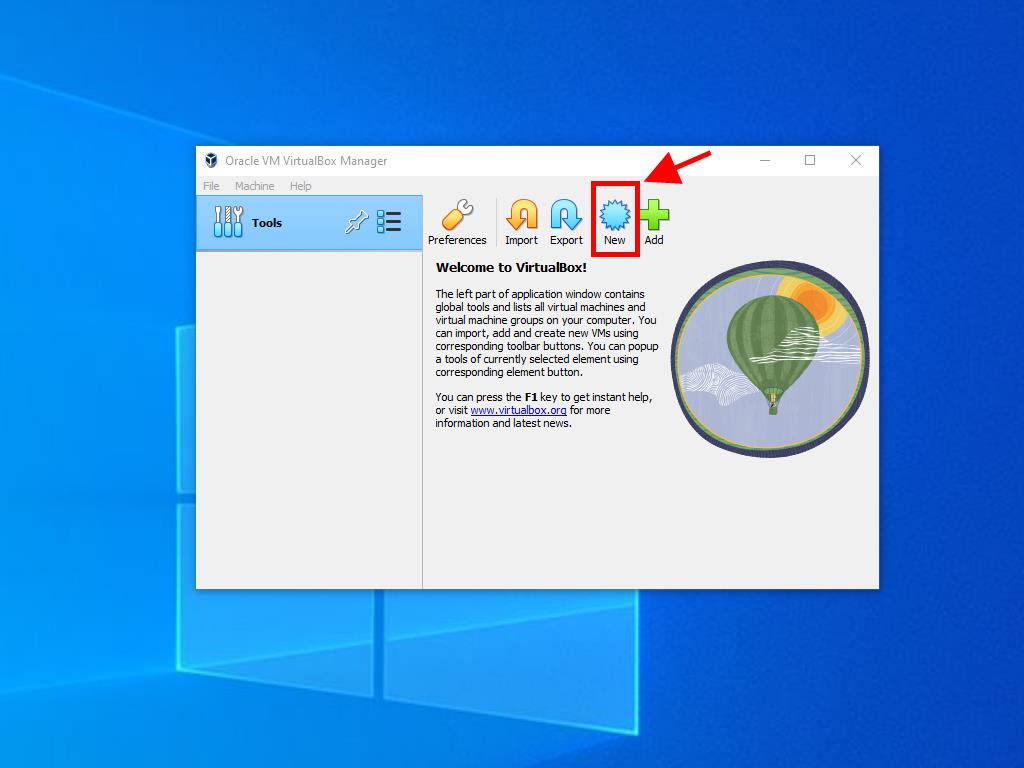
- Click the New button in the Machine menu.
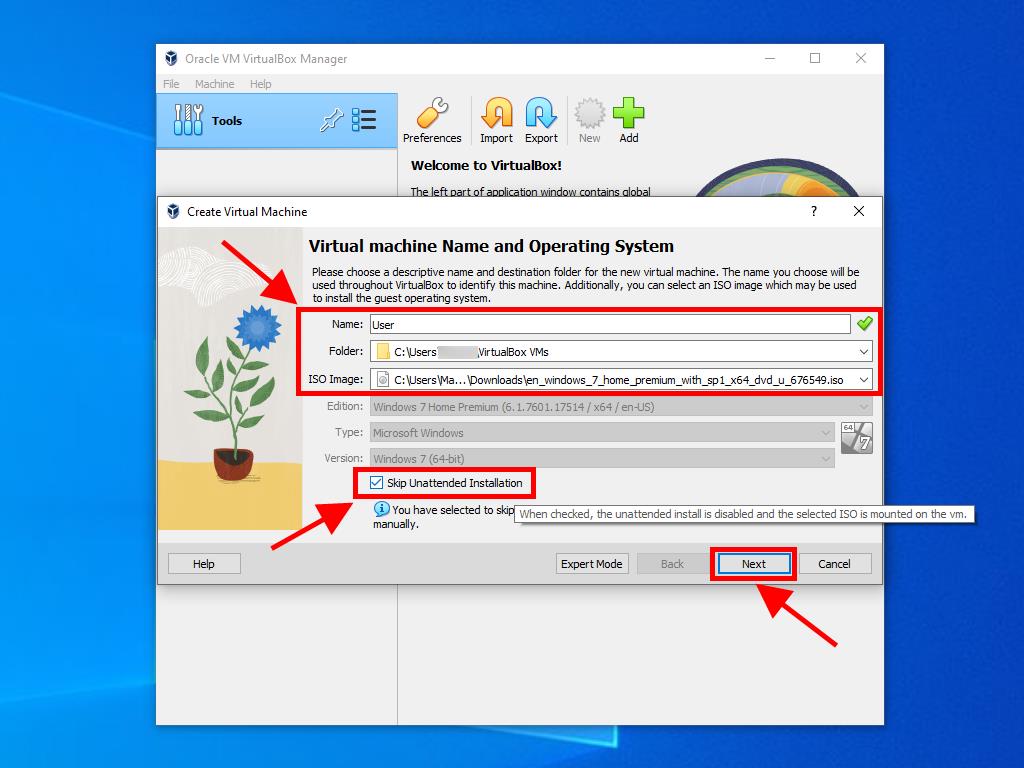
- Name your new Virtual Machine, pinpoint the location of the Windows 7 .iso file, and press Next.
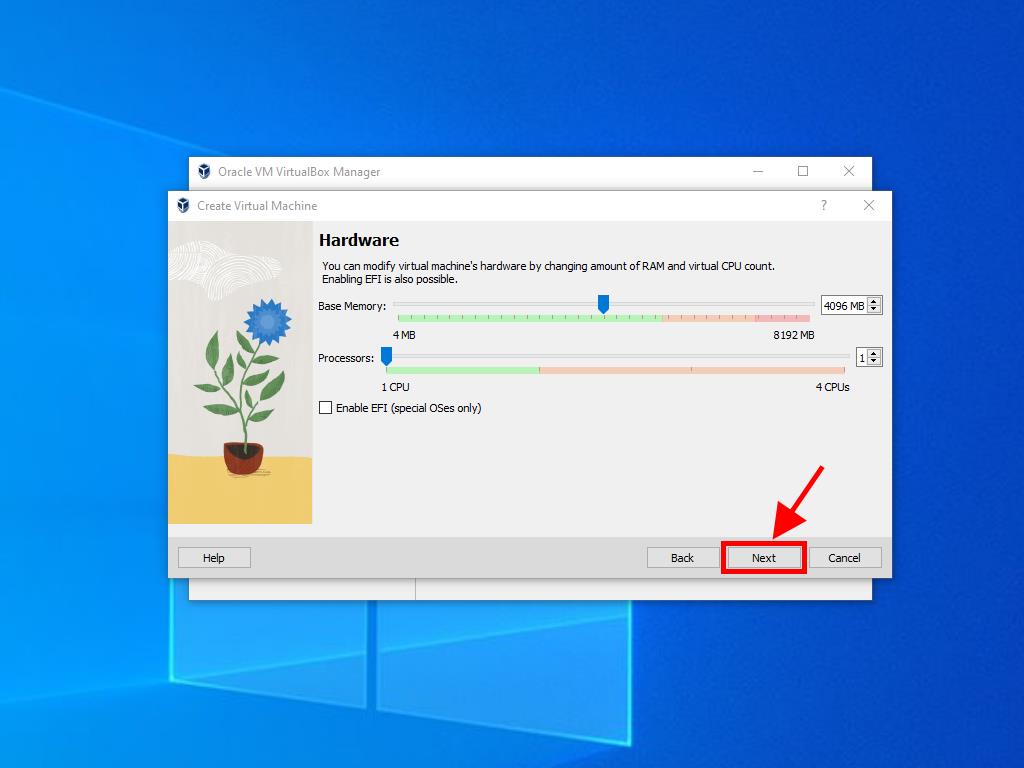
- Designate at least 2 GB of RAM for optimal performance and click Next.
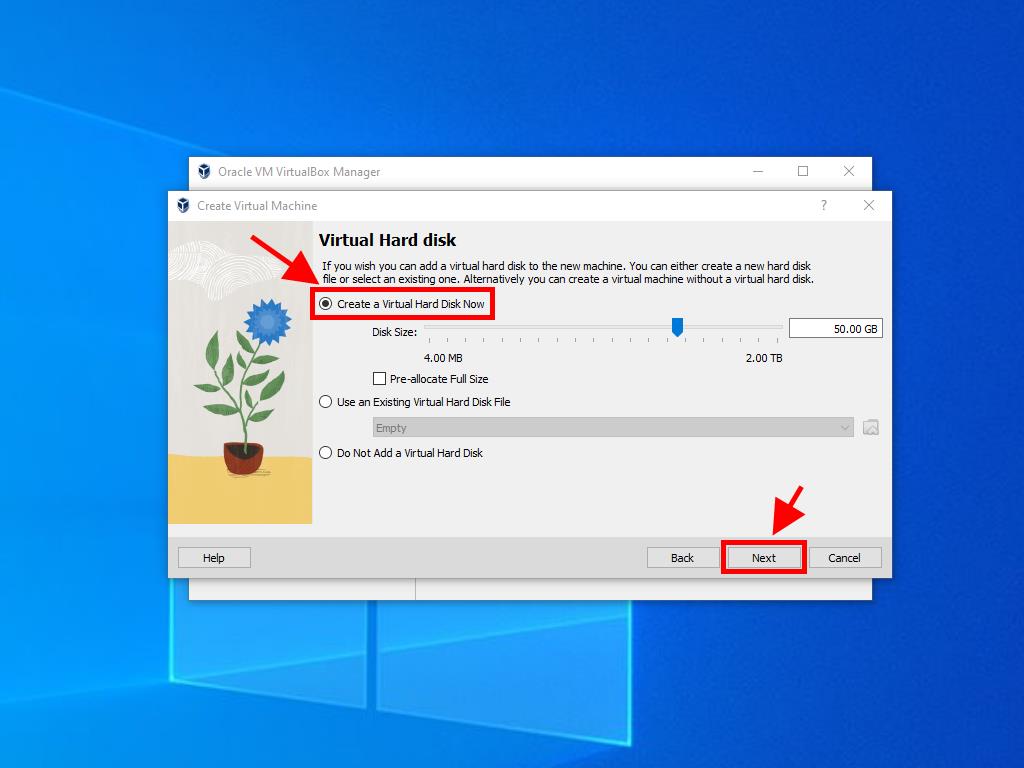
- Opt to Create a Virtual Hard Disk Now; a minimum of 32 GB is recommended for proper operation. Click Next.
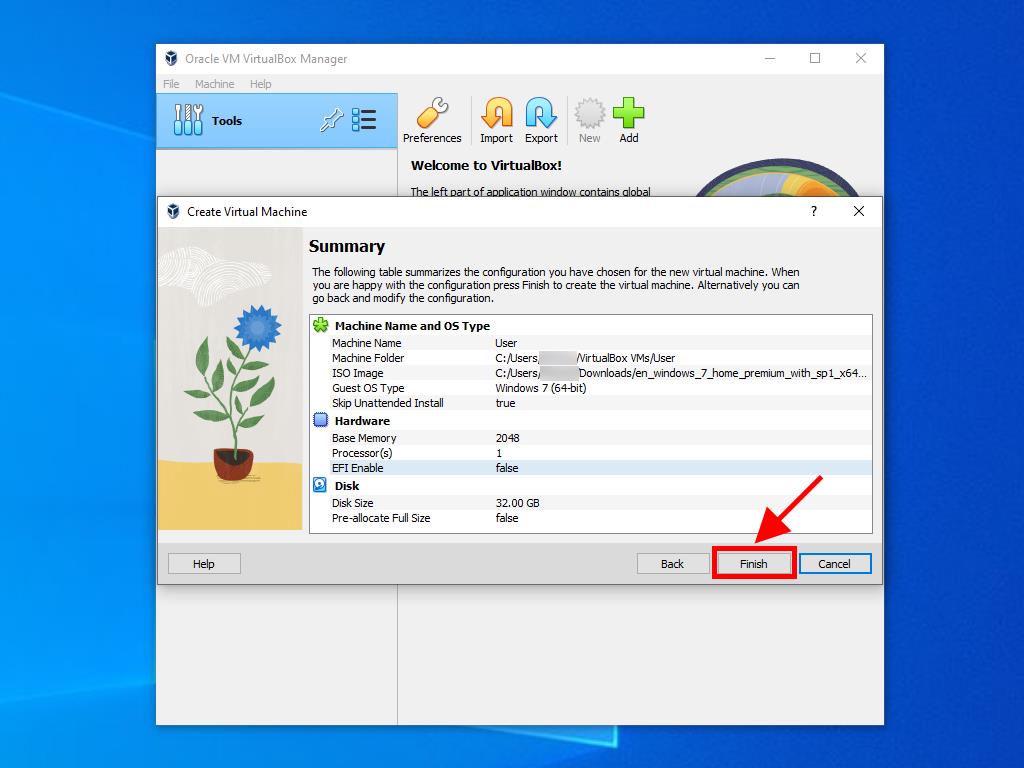
- After the setup overview, click Finish.
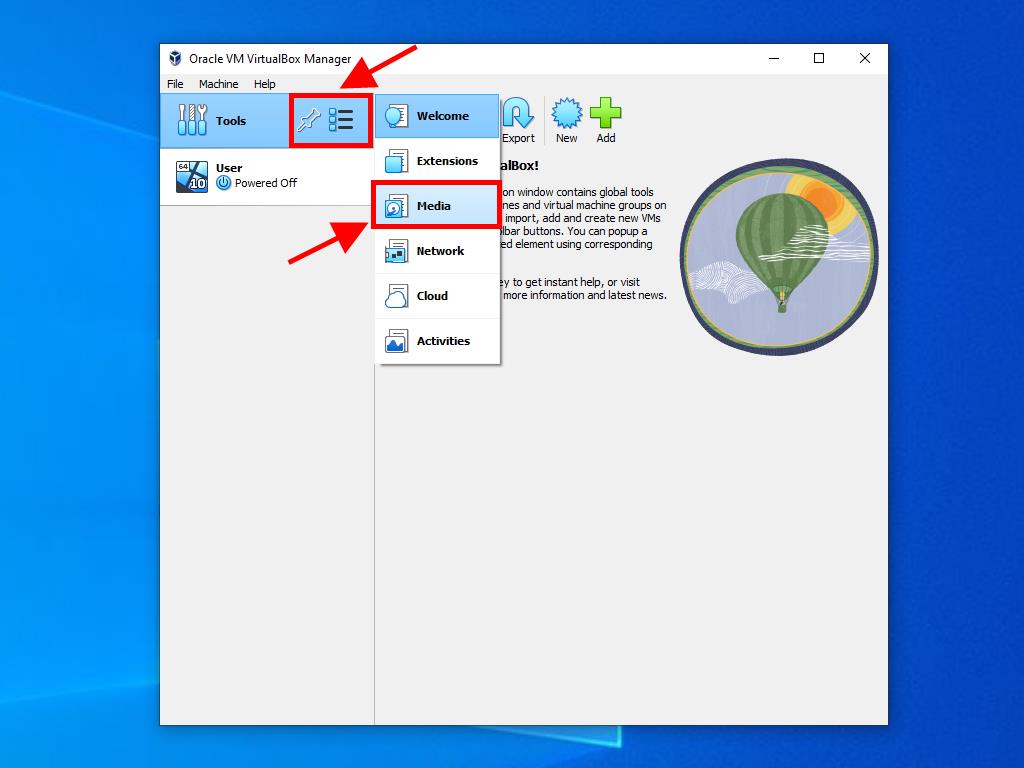
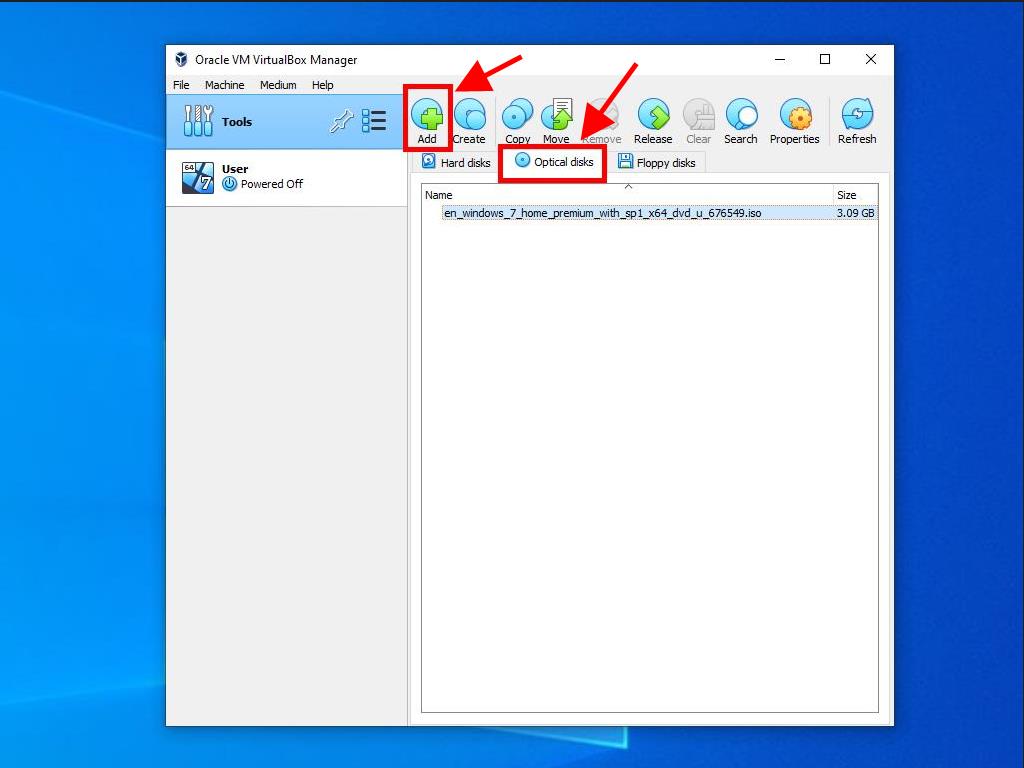
- Access the Tools menu, select the three dots, open the dropdown menu and click on Media to load the Windows 7 .iso file.
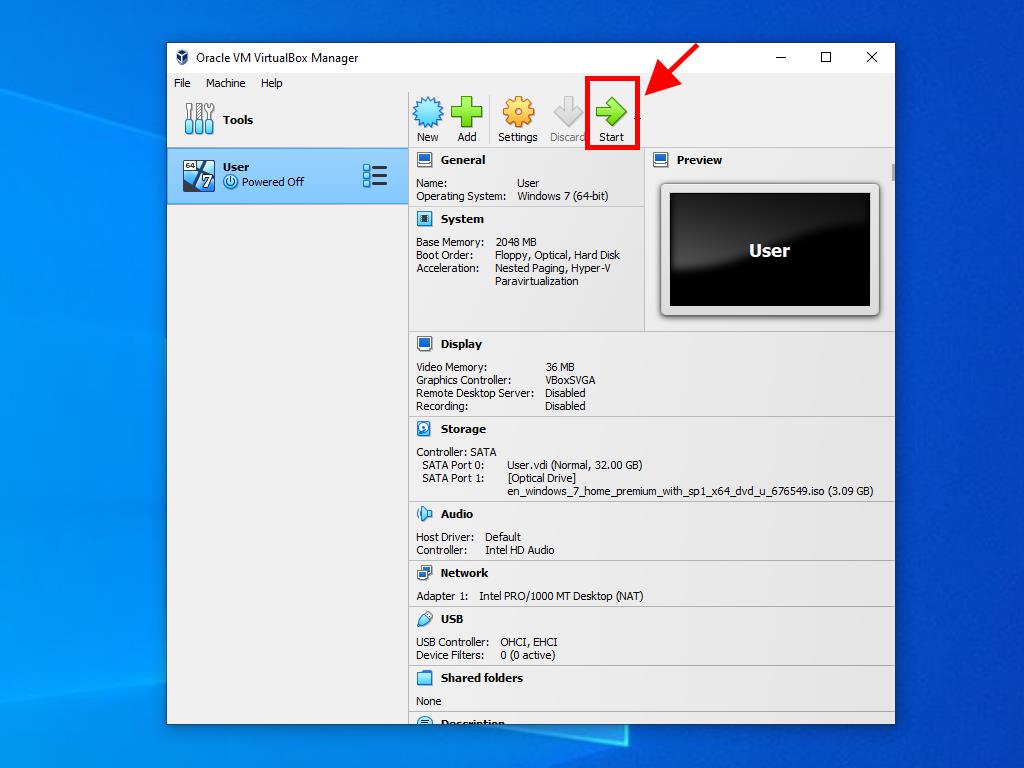
- Initiate the virtual machine by selecting Start.
- The installation of Windows 7 will start promptly.
- For additional details on Windows setup, consult our guide: How do I install Windows 7?.
Ensure to uncheck Skip Unattended Installations.
This guide provides essential steps and tips for a successful installation.