Sign In / Sign Up
 Orders
 Product Keys
 Downloads

 Go to notfound
Initiating Windows 7 Installation
Once you've made a USB bootable drive, follow these steps for a fresh install:
- Power up your PC and let Windows load as usual; insert the Windows 7 DVD or USB, and then restart your PC.
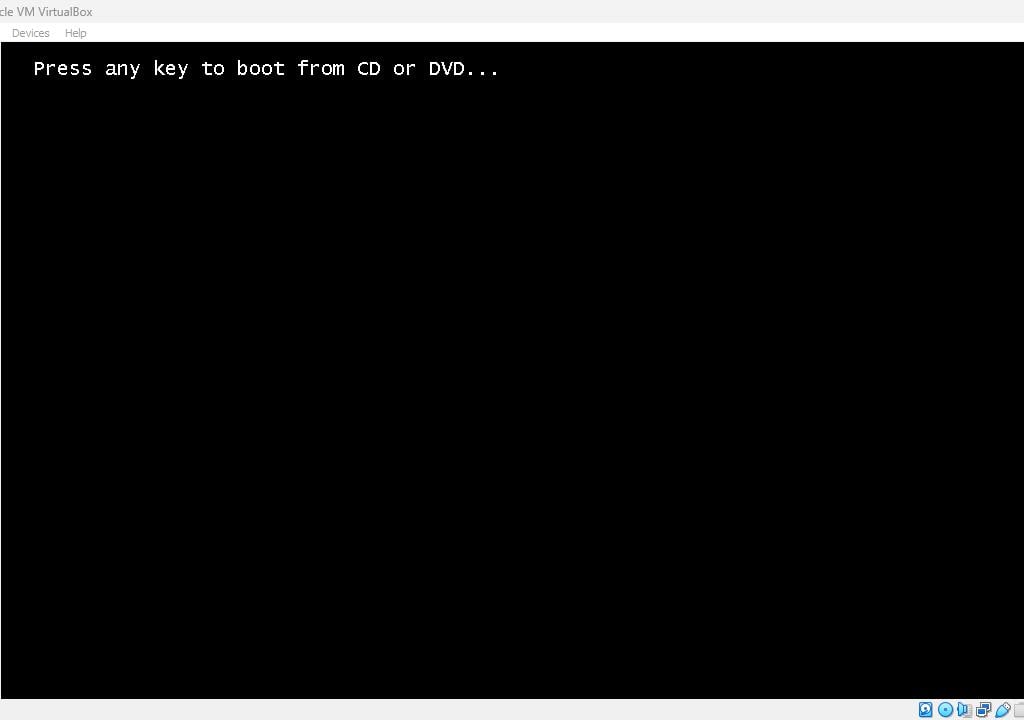
- Your machine will boot from the Windows 7 USB. Hit any key when you see Press any key to boot from CD or DVD.
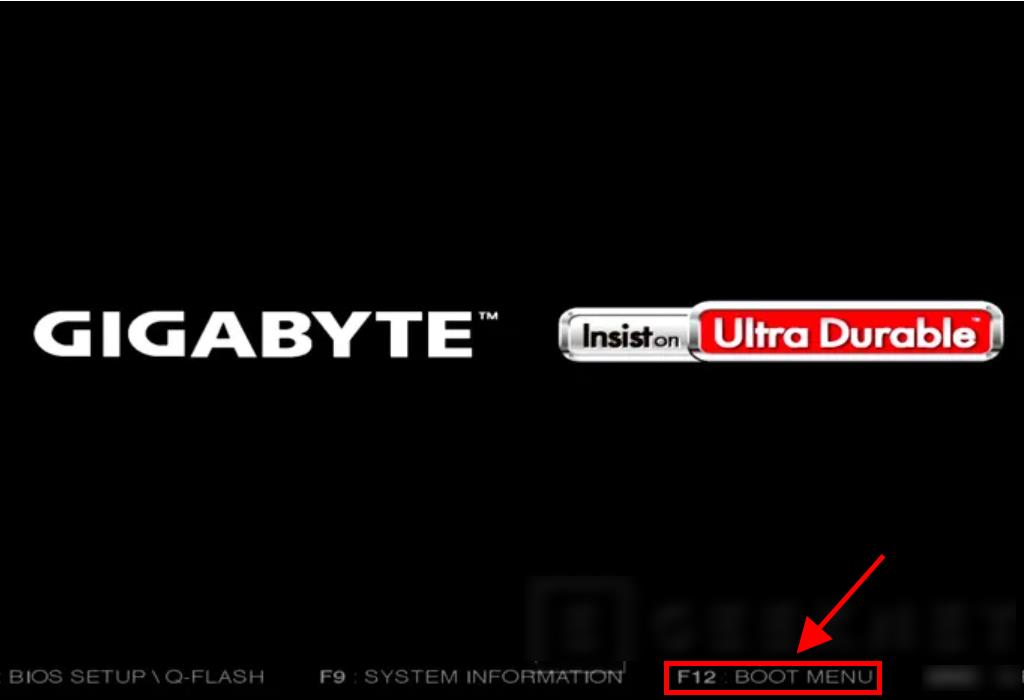
- Restart your PC, and when the manufacturer’s logo shows up, press the BOOT menu key, often F2, F10, F11, F12, or Del, to open the menu.
- Change the boot sequence to USB.
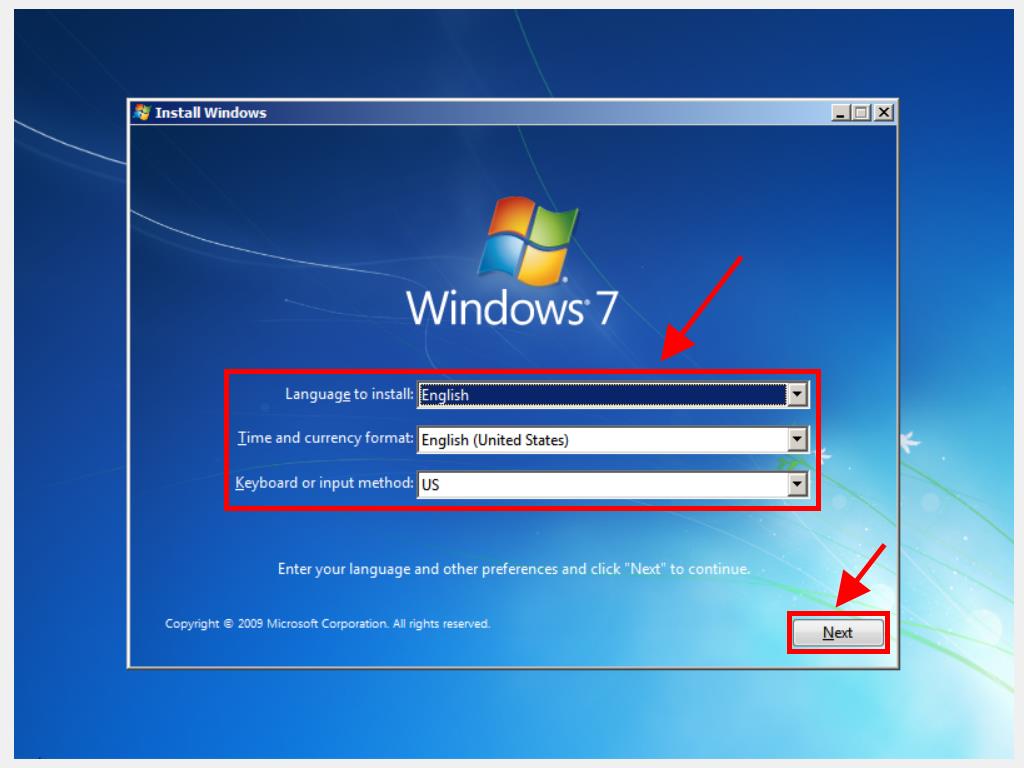
- In the setup program, choose your language, time, currency format, and keyboard or input method, then click Next.
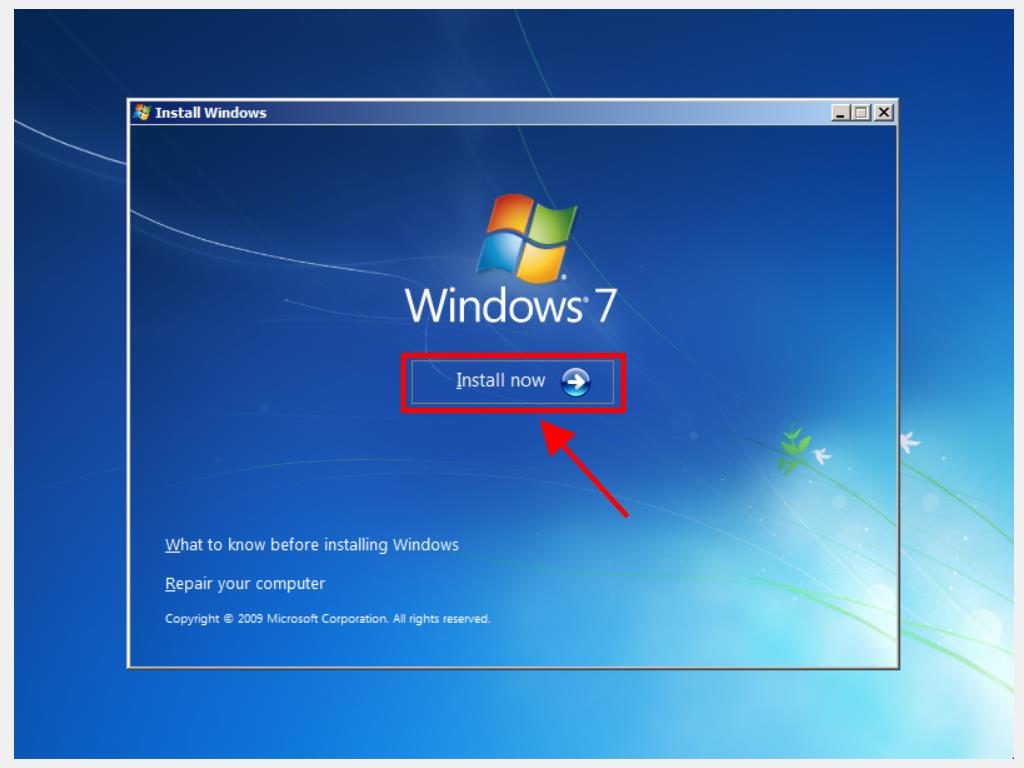
- Click Install now to begin.
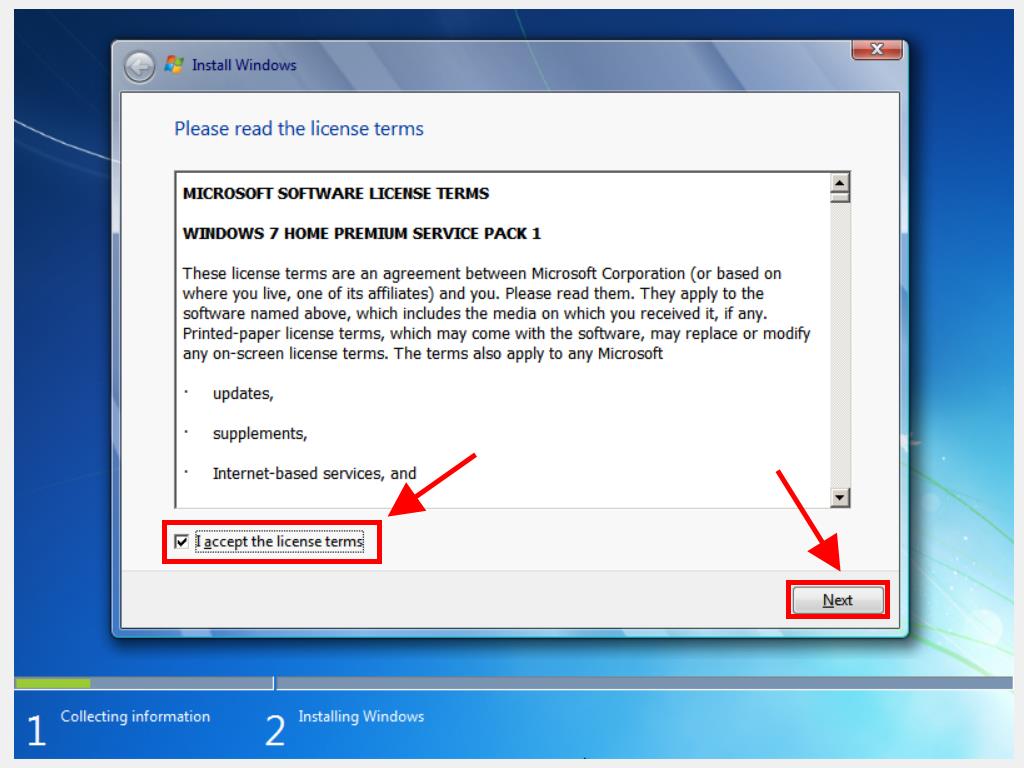
- Accept the license terms and click Next.
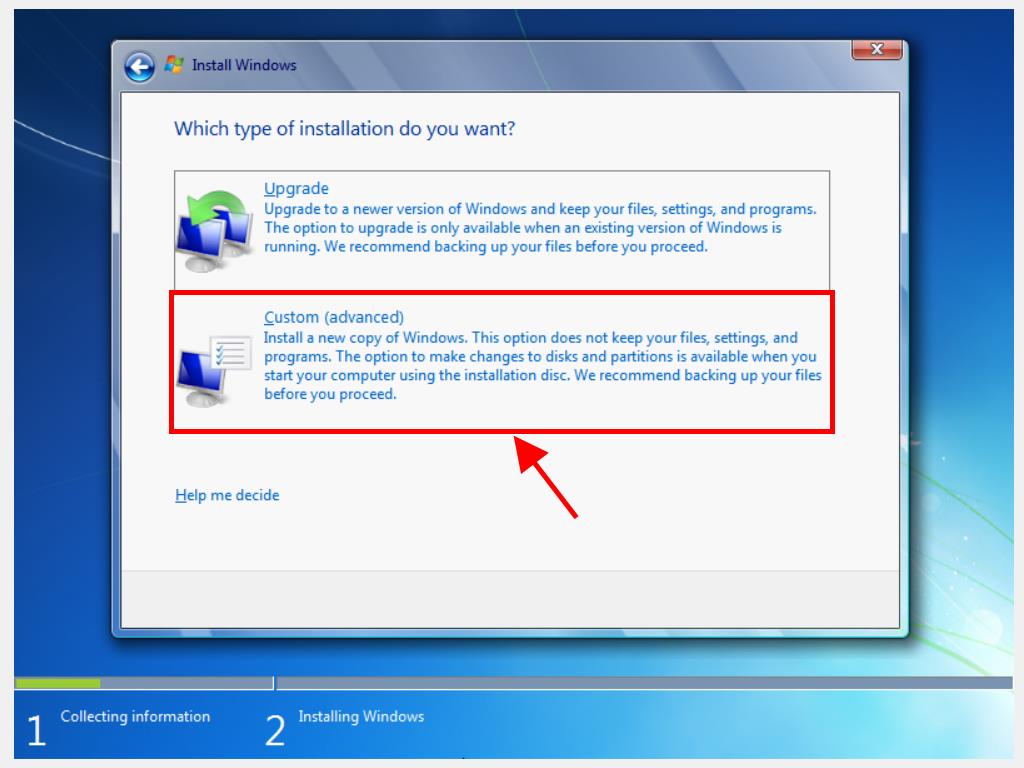
- On the next page, select Custom (advanced).
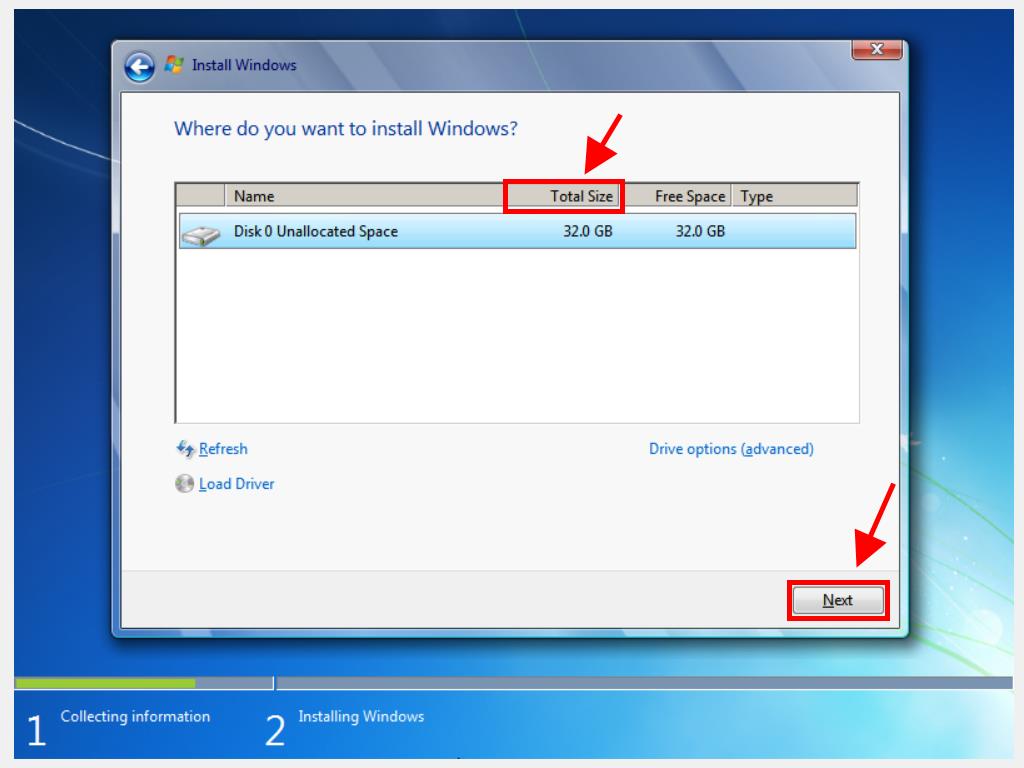
- In the next box, pick the drive where you want to install Windows 7. Click Next.
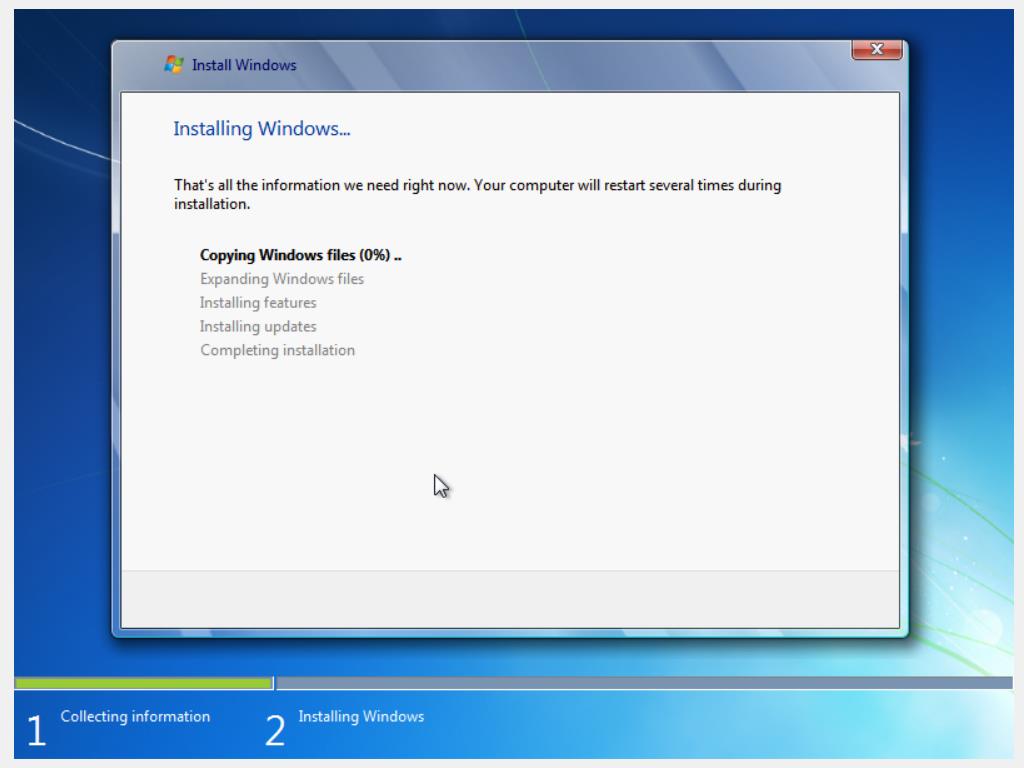
- Click Next and Windows will begin installing.
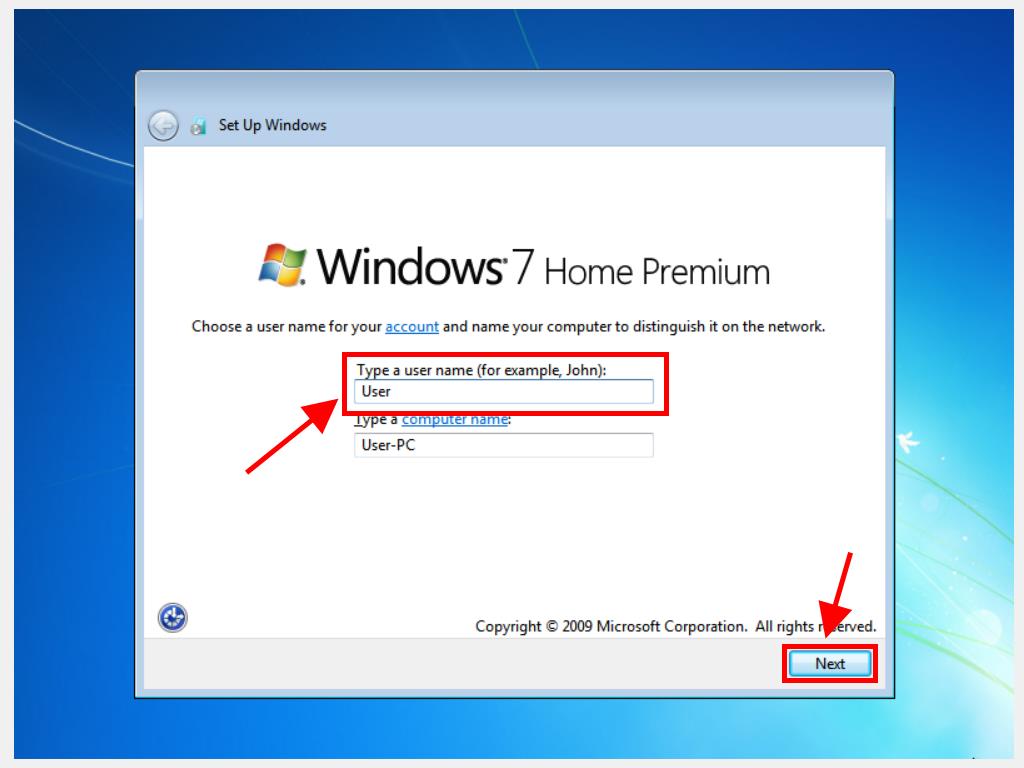
- After several restarts, personalise your PC by entering a name and clicking Next.
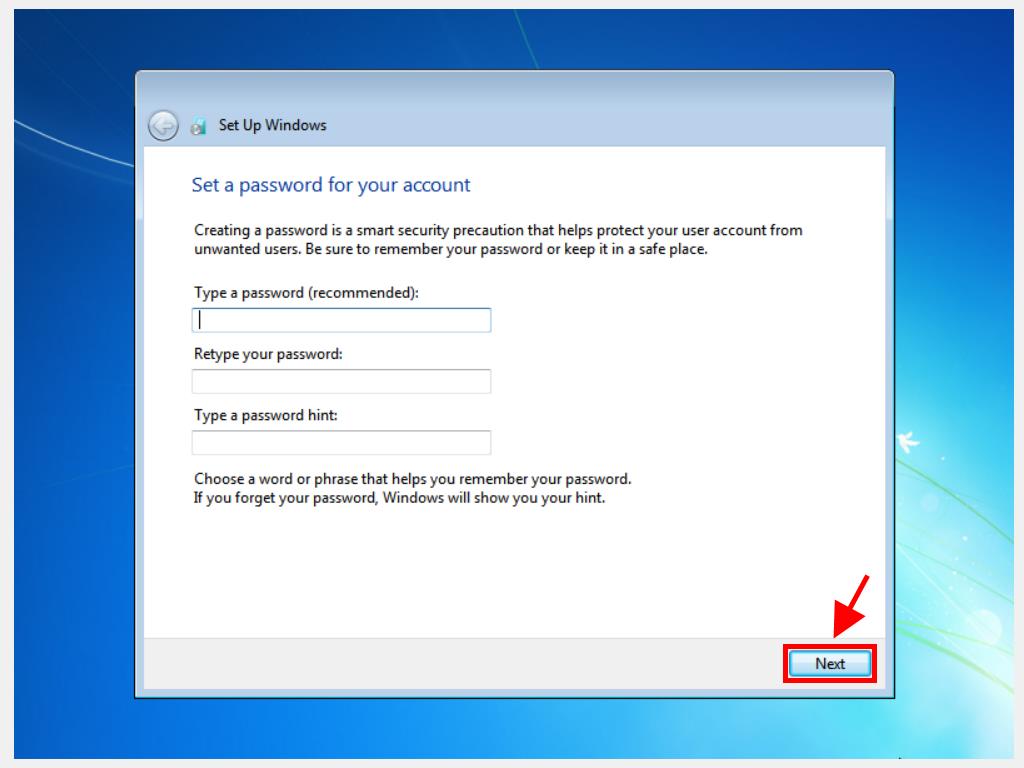
- Set a password for your account. You can choose an easy-to-remember one or leave it blank and click Next.
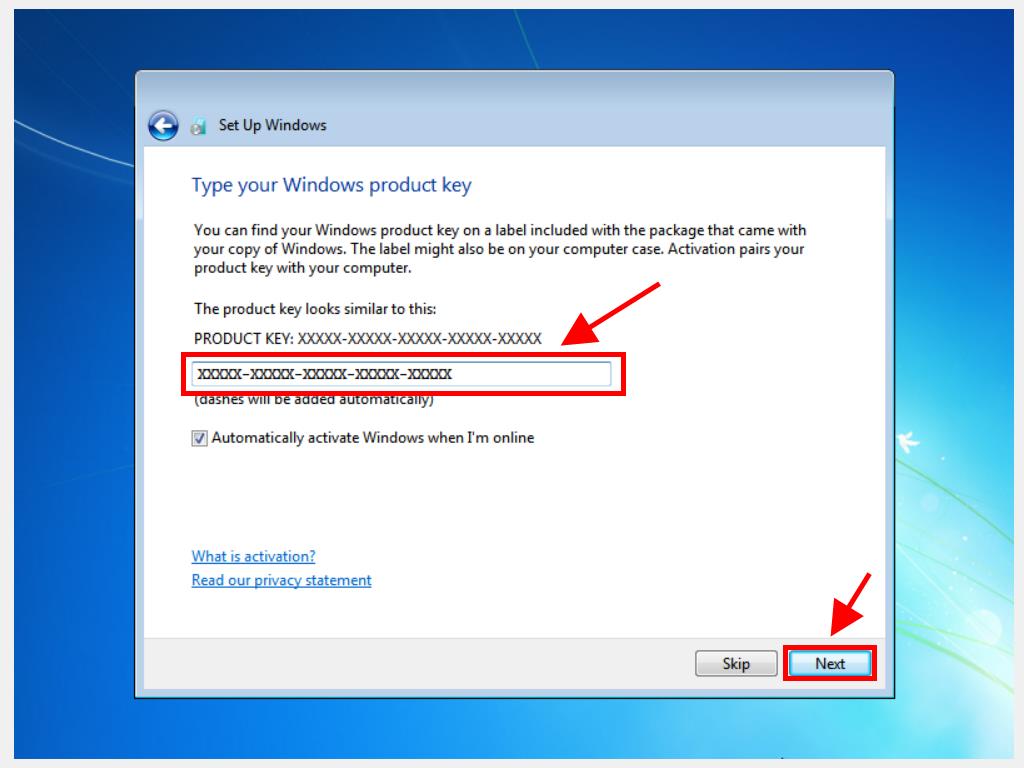
- Enter the product key now. Click Next.
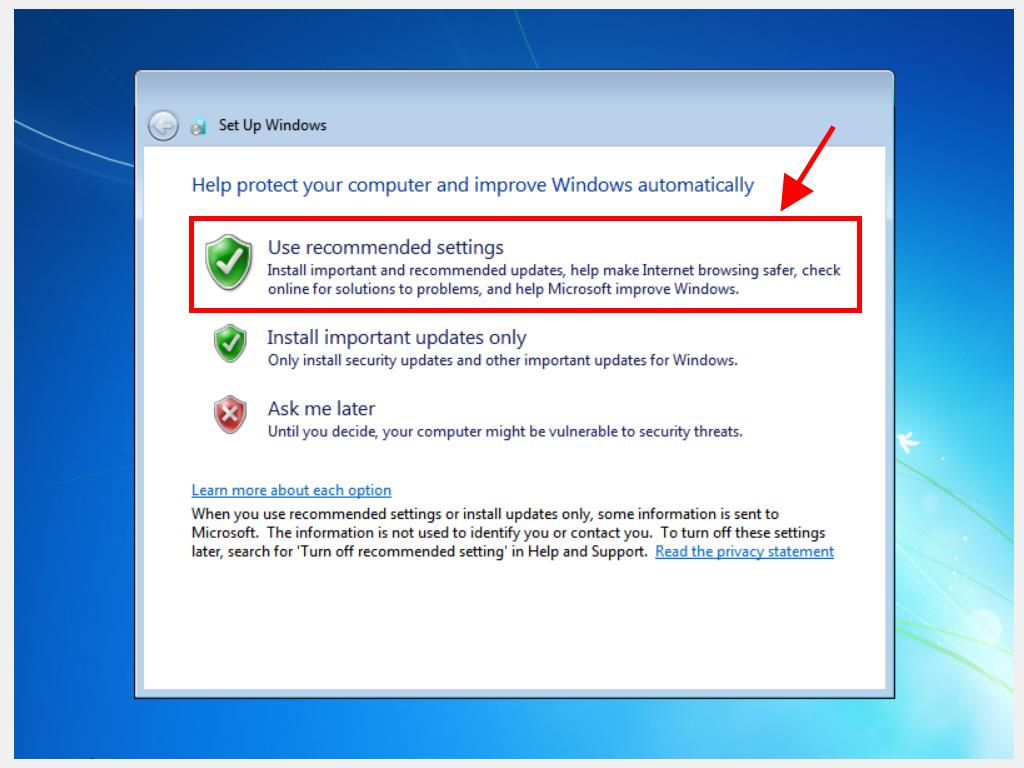
- The integrated Windows protection modes will appear. Click Use recommended settings.
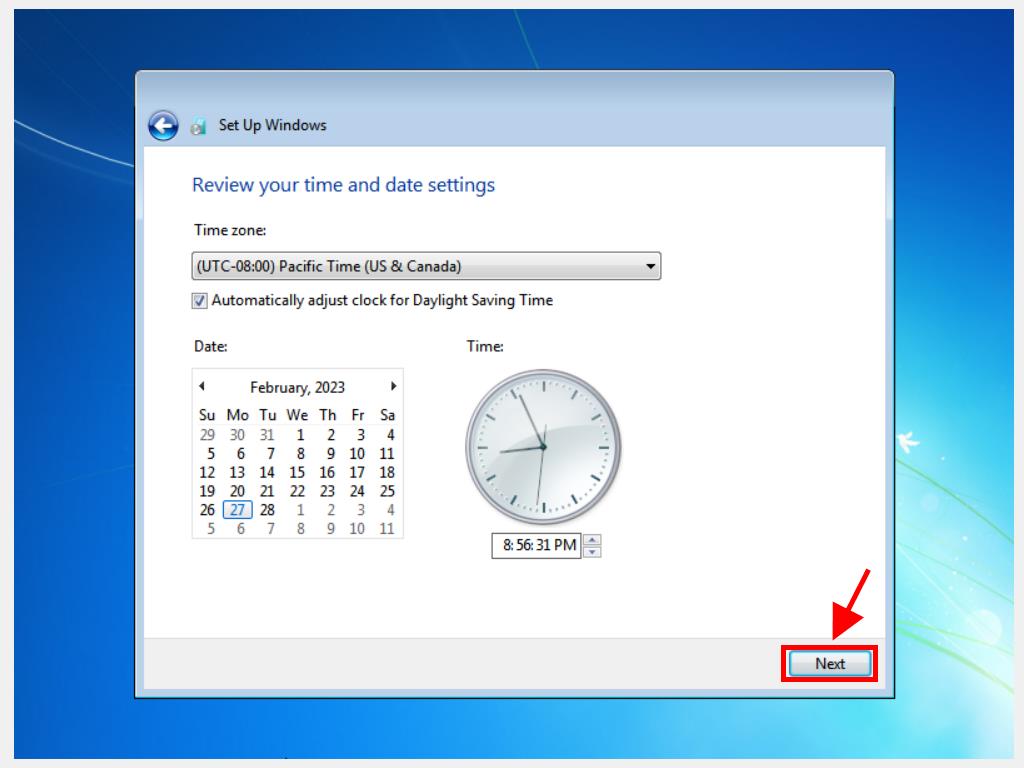
- Adjust the time and date settings and click Next.
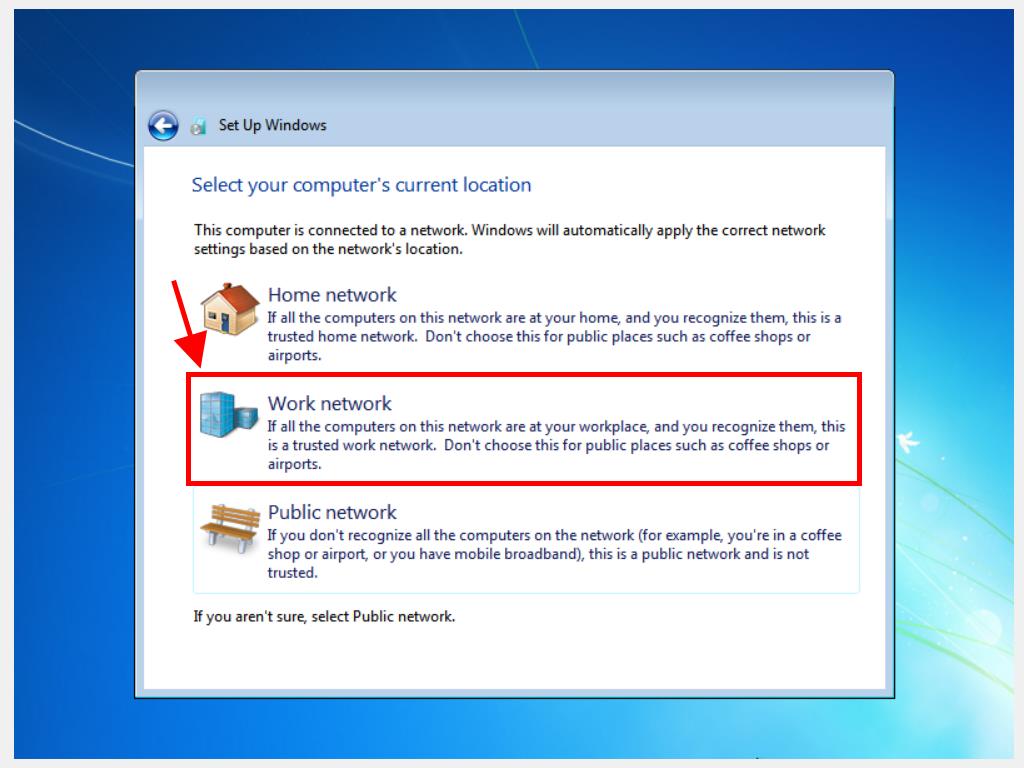
- On the Network Settings page, select the one that suits your needs or a standard configuration. Click Work network.
- Wait a few minutes, and Windows 7 will be fully installed.
Note: If your current Windows version loads after rebooting, adjust the boot order in your BIOS settings to boot from the DVD.
Note: To identify the right drive, look at the Total size column and select the drive with the most space in GB.
Note: It’s best to enter the product key here to ensure the correct edition of Windows 7 is installed. Skipping this step may result in installing a different edition.