 Sign In / Sign Up
 Orders
 Product Keys
 Downloads

 Go to notfound
How to Craft Your Own Windows 11 Installation Media
Once you've obtained the Windows 11 installation file (.iso), you can create a USB boot disk (also known as a pendrive) for the installation process.
Note: A USB device with at least 16 GB of storage is required.
Here are the applications you can use for this:
Rufus
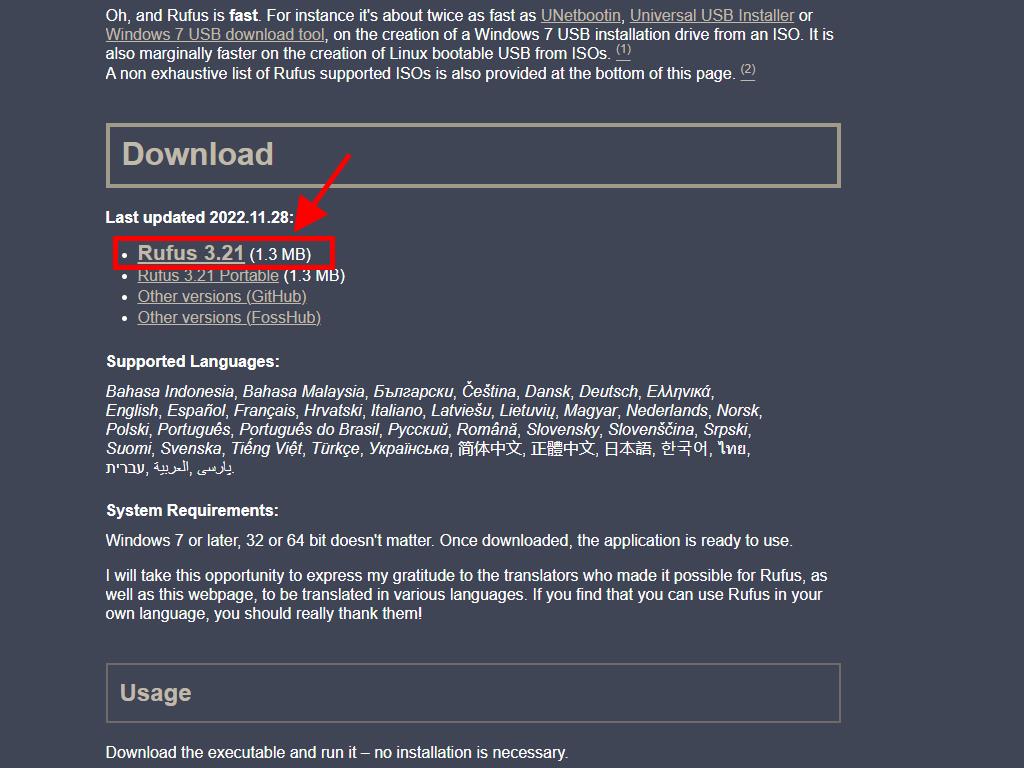
- Download Rufus for free here.
- Scroll down and get the latest version of Rufus from the Download section.
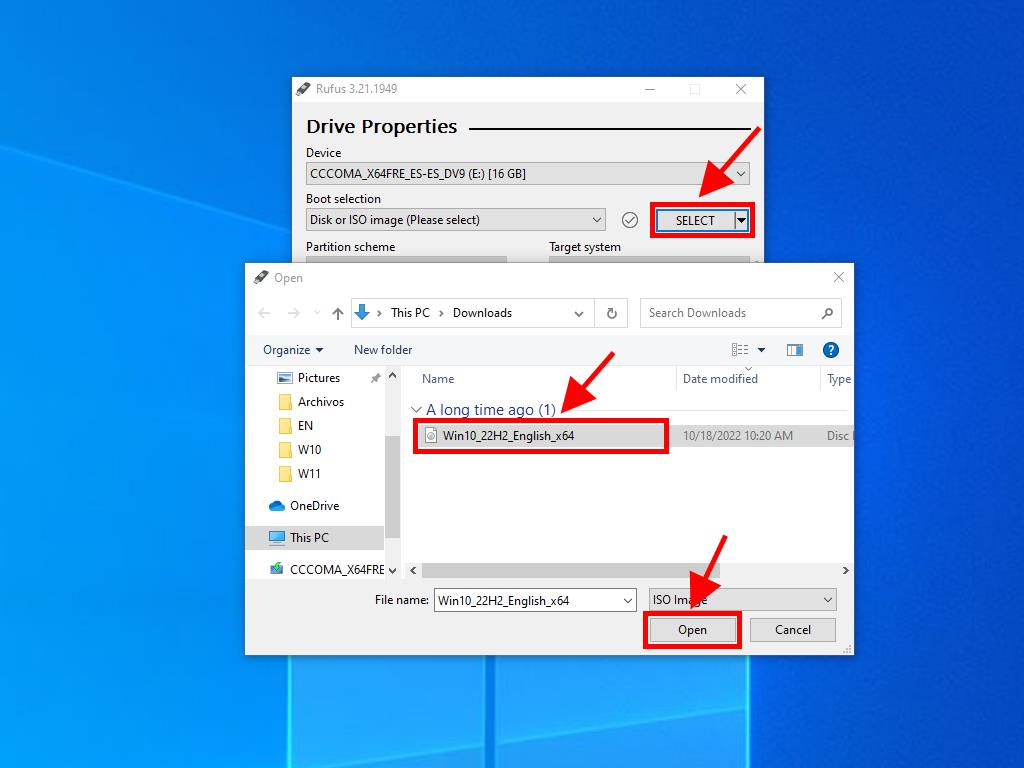
- Connect your USB and open the Rufus program.
- Click on Select and locate the Windows 11 .iso file you want to use.
- Finally, click on Start and wait for the program to create the bootable USB drive.
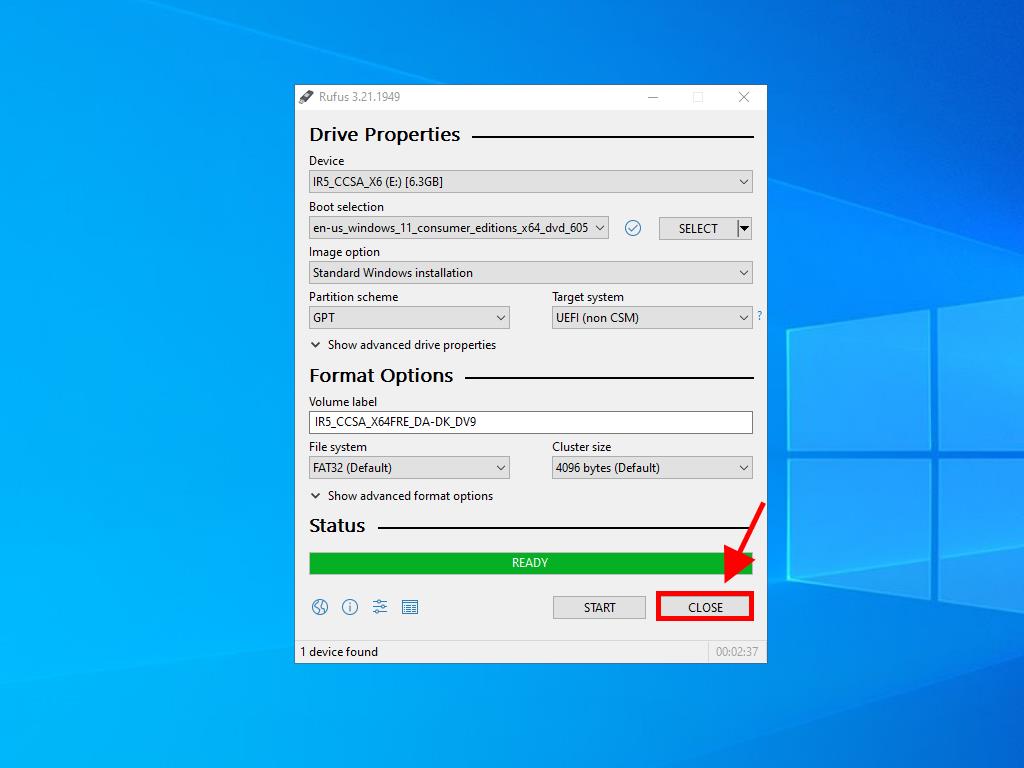
- Once the setup is complete (progress bar at 100%), click on Close and your USB drive will be ready to install Windows 11.
Note: A window named Customize Windows Installation will pop up. Select the Disable Data Collection option and wait for the program to finish creating the bootable USB drive.
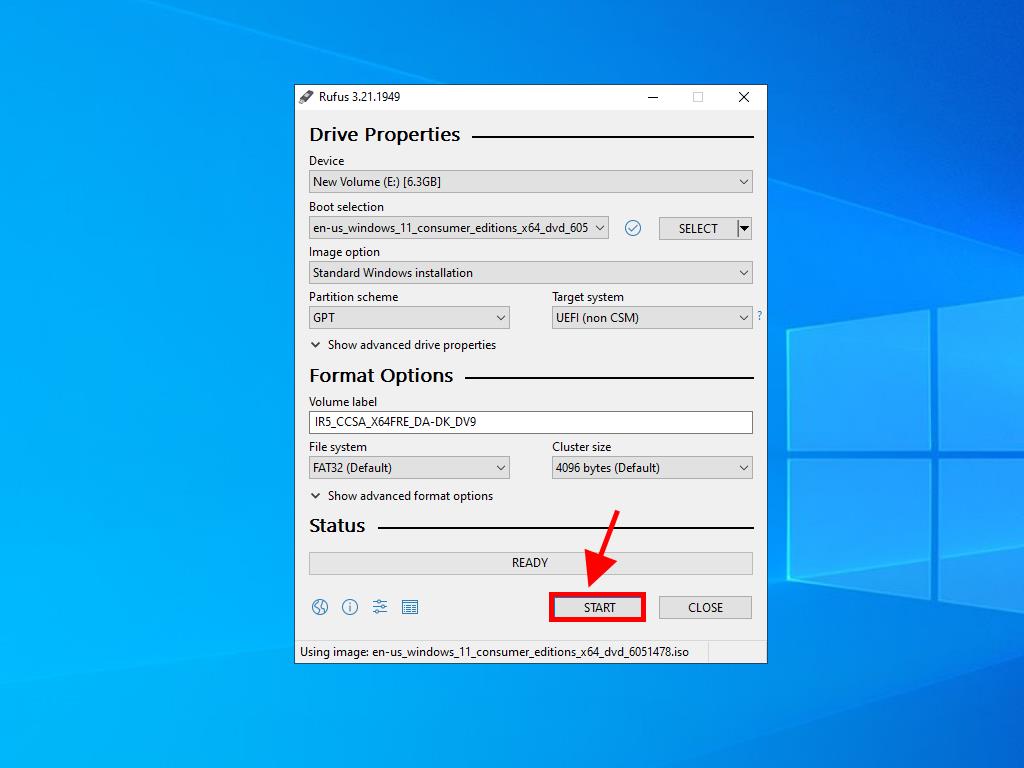
Note: For PCs released after 2020, select the GPT partition scheme option. For older models, select MBR.
MediaCreationTool
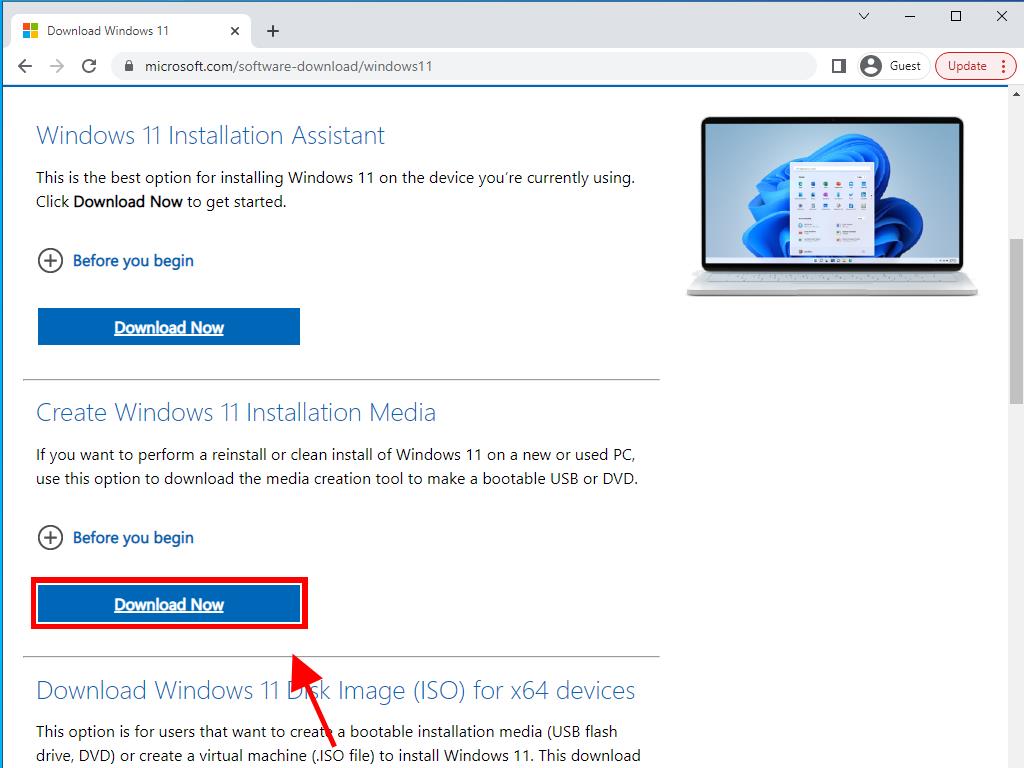
- Download it for free here.
- Click on Download now.
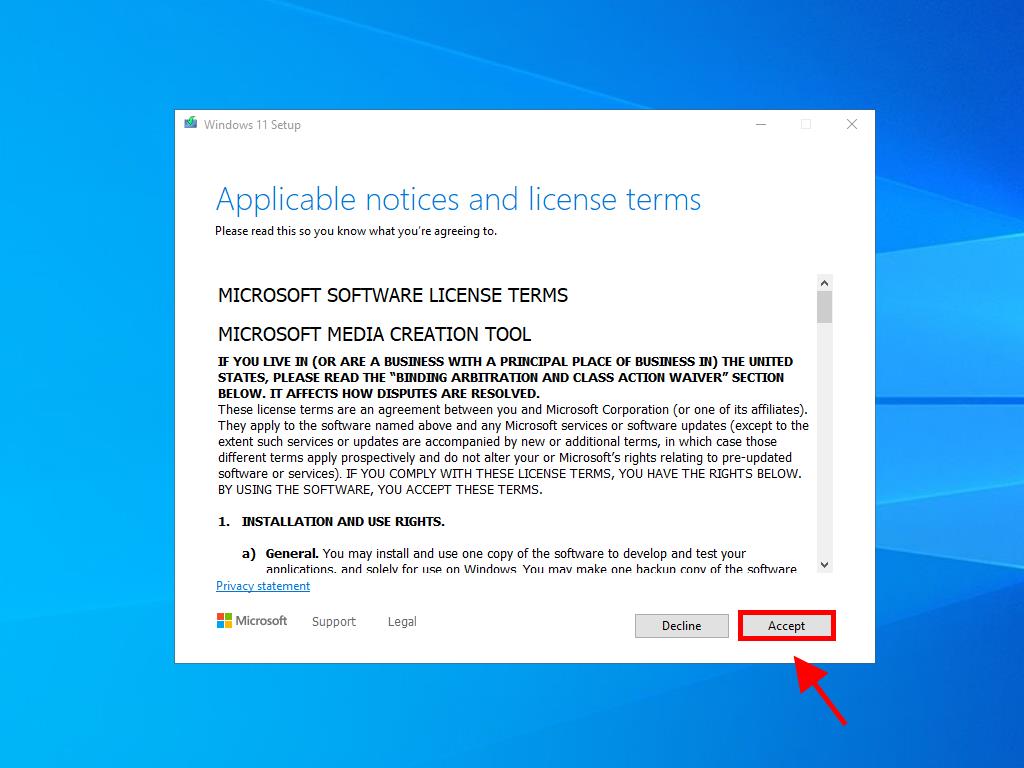
- Accept the terms to install it, then click on Accept.
- After accepting the terms, a box will appear. Select the language and edition, then click on Next.
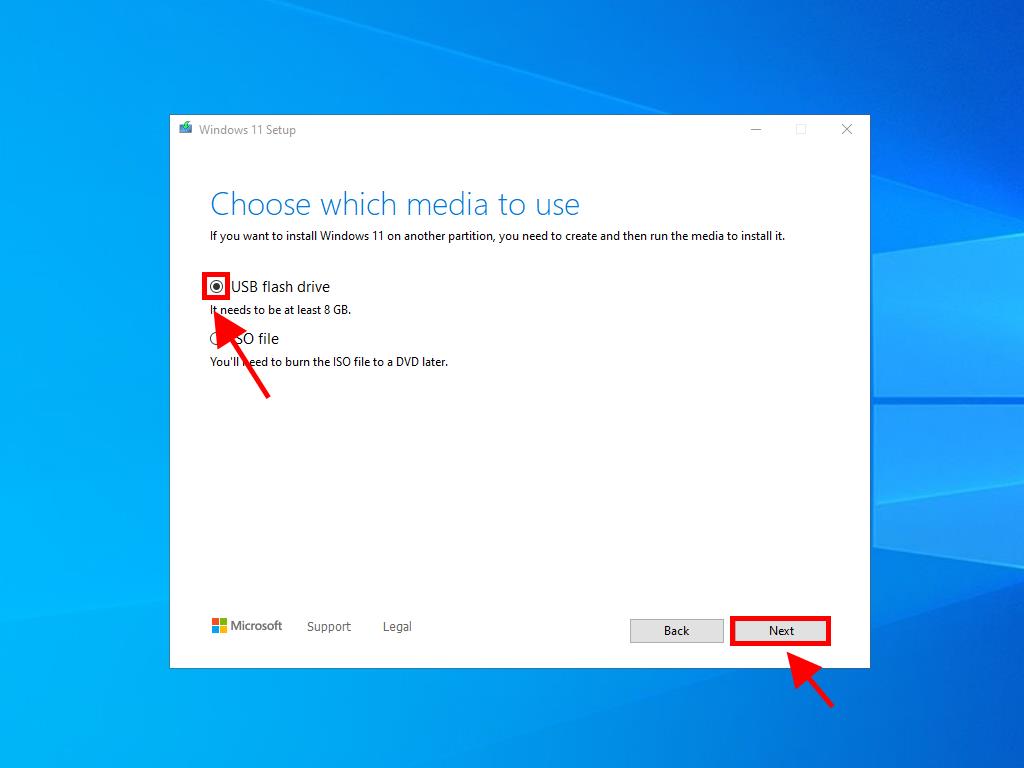
- Select USB flash drive.
- Click on Next.
- This will start the download and setup on your USB drive.
Note: If the language or Windows edition isn't right, uncheck the box labelled Use the recommended options for this Pc, and you can select your preferred language and edition.

Note: If your USB drive isn't visible, close the application and restart it without removing the USB. Save any data on the USB drive beforehand, as it will be erased.