Sign In / Sign Up
 Orders
 Product Keys
 Downloads

 Go to notfound
Comprehensive Installation and Activation Guide for Office 2010
To install Office 2010, you need to consider your PC's operating system. Below, we'll show you how to install it on different Windows systems:
Process to install Office 2010 on computers with Windows 8.1, 10, and 11
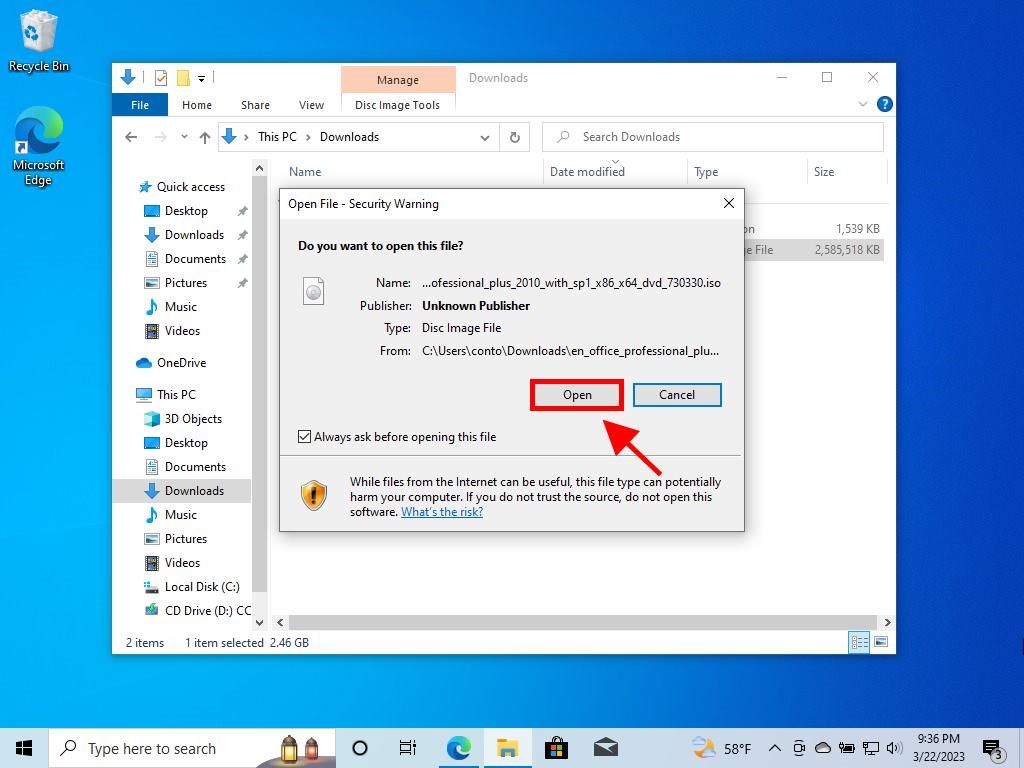
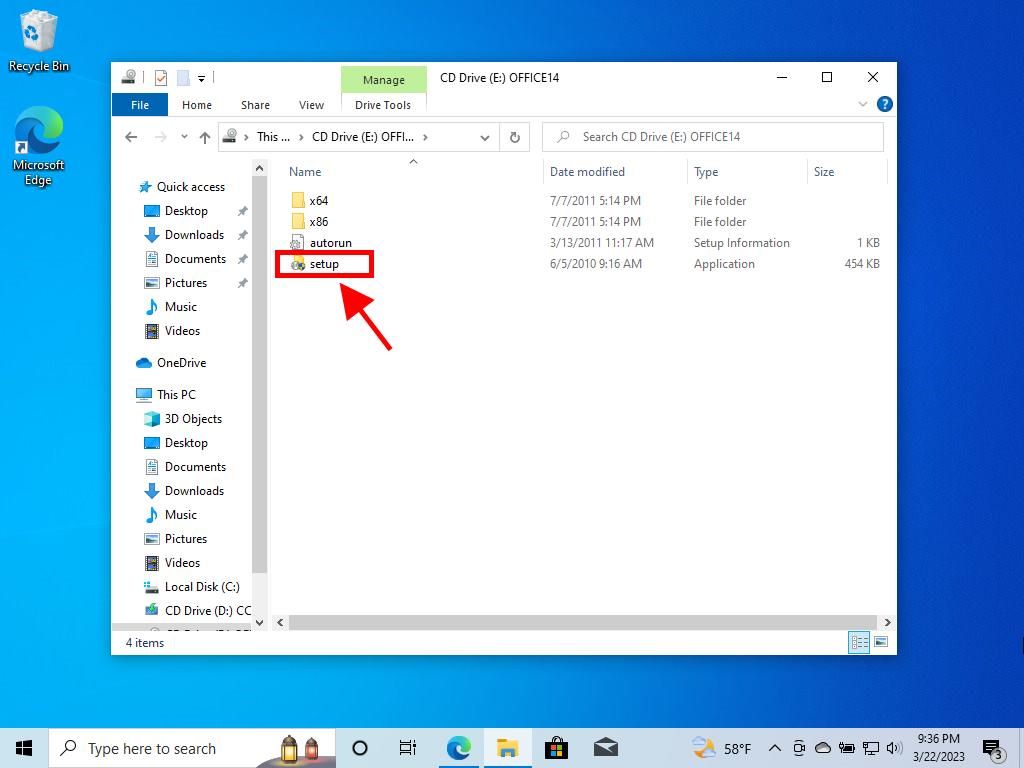
- Once you have downloaded the Office 2010 .iso file, locate the file and double-click on it. In the dialogue box, click on Open.
- A window will open, and double-click on the Setup file.
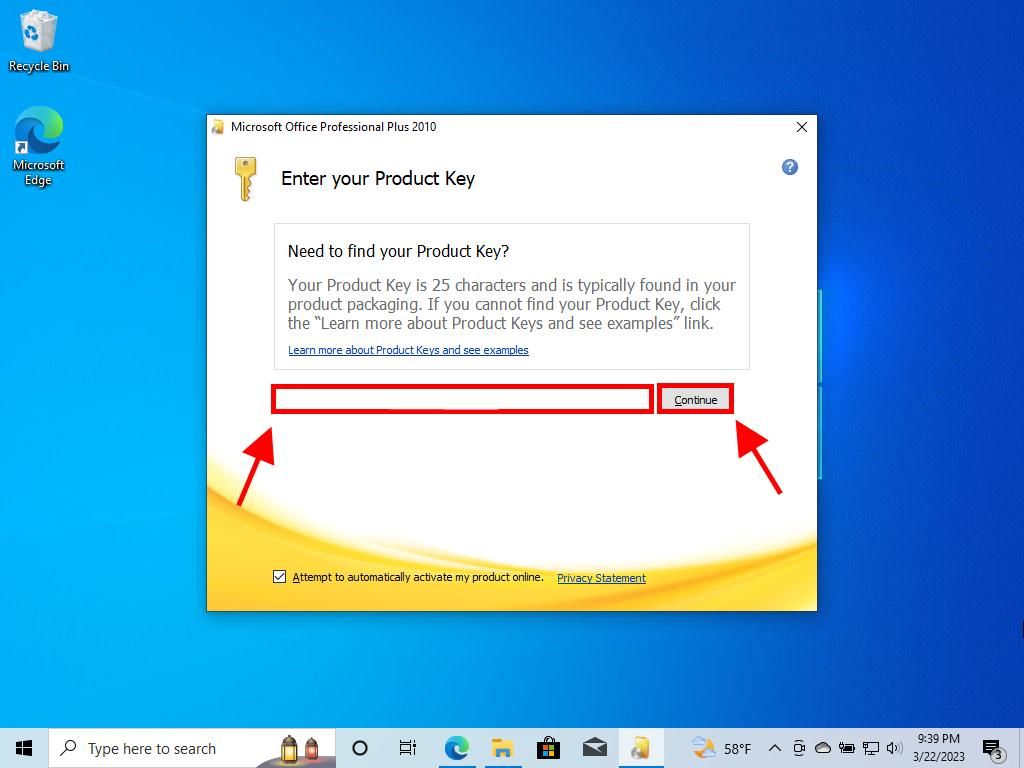
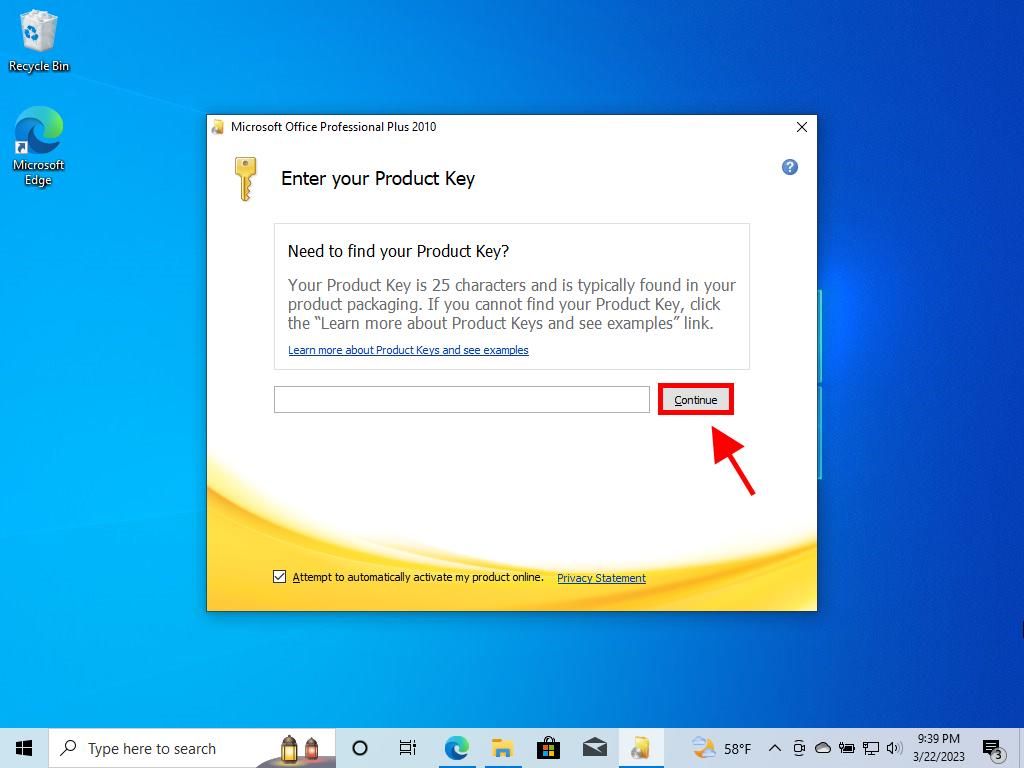
- Enter your Office product key and click Continue.
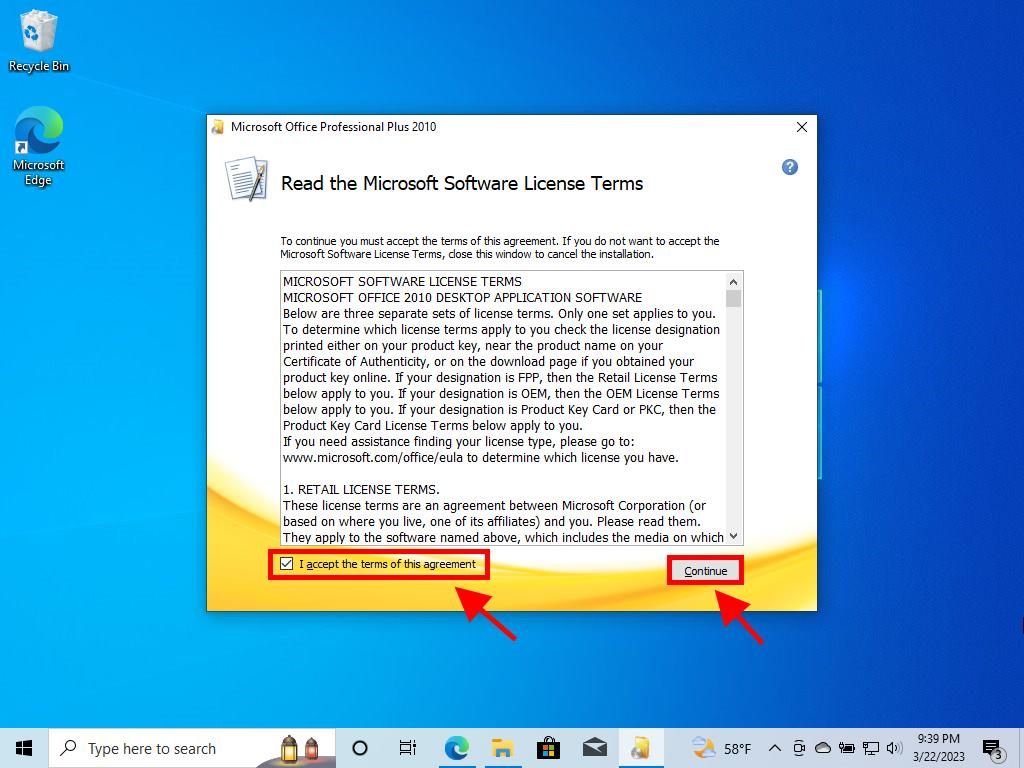
- Tick the box to accept the terms and conditions and click Continue.
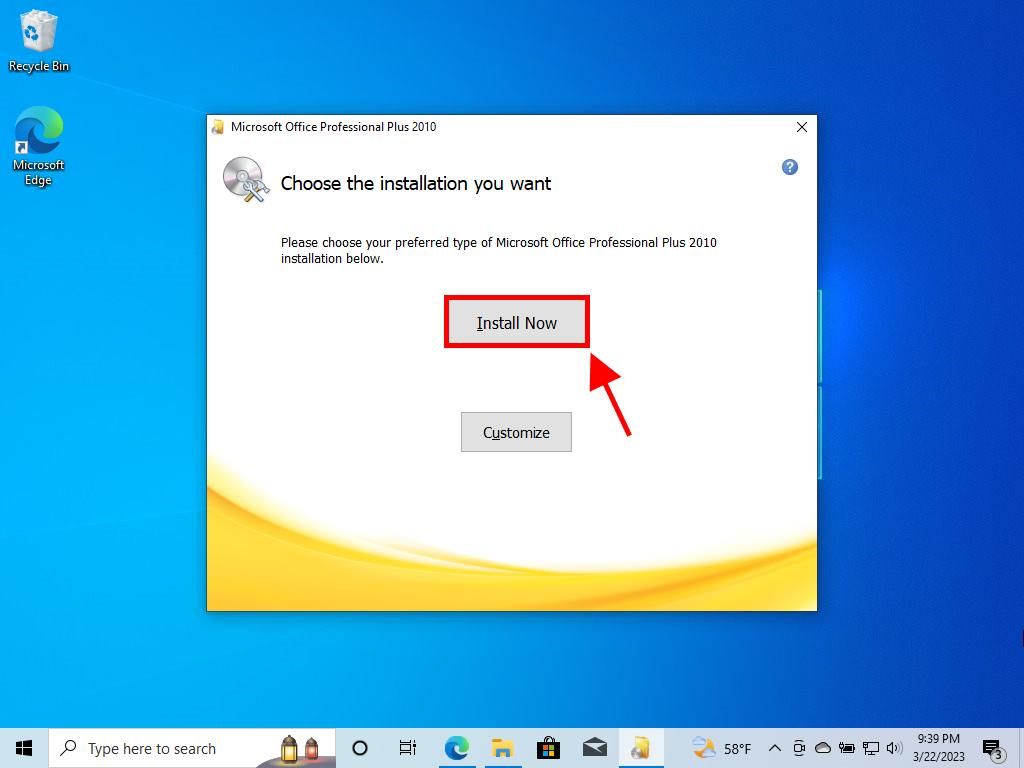
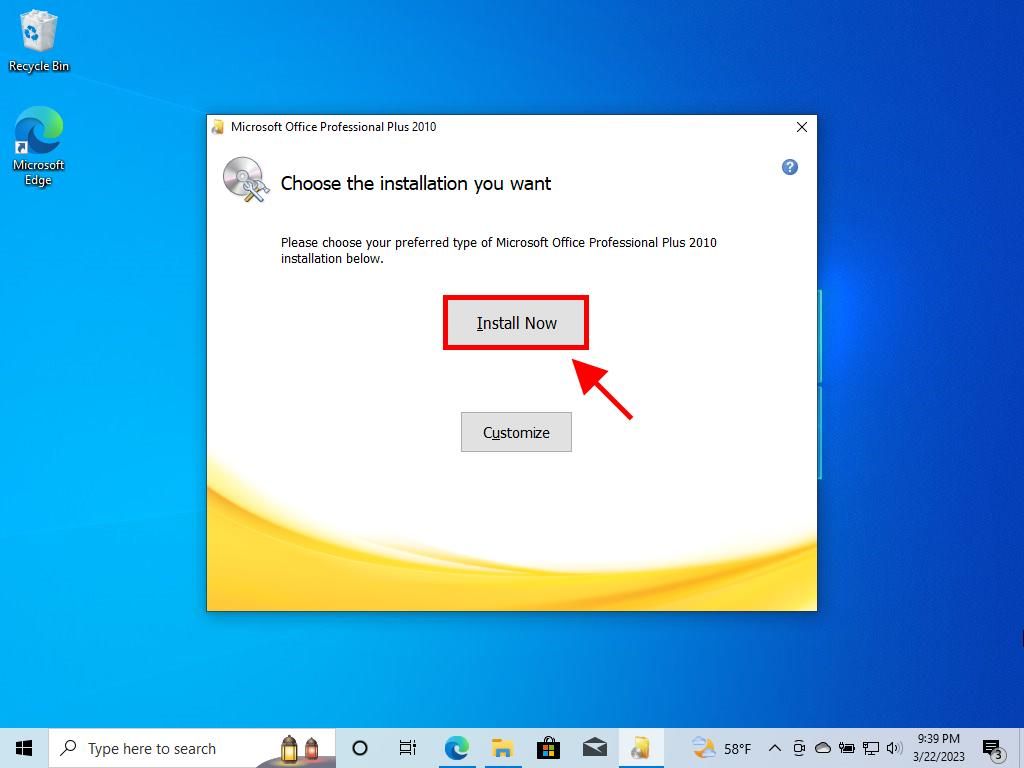
- Click on Install now.
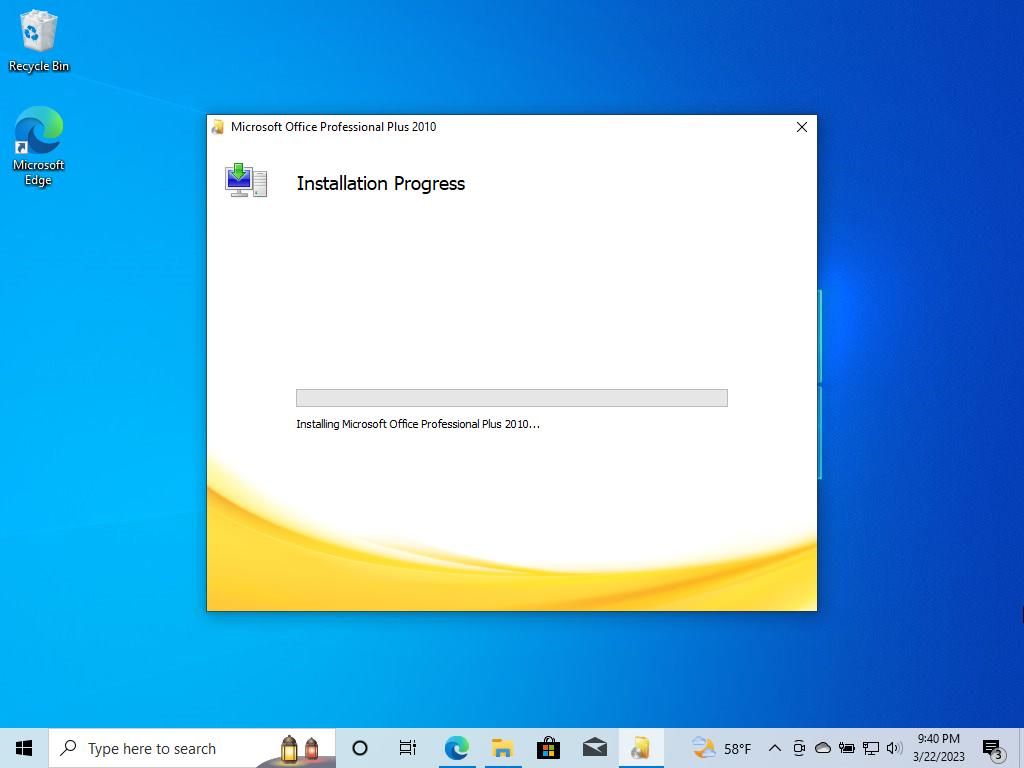
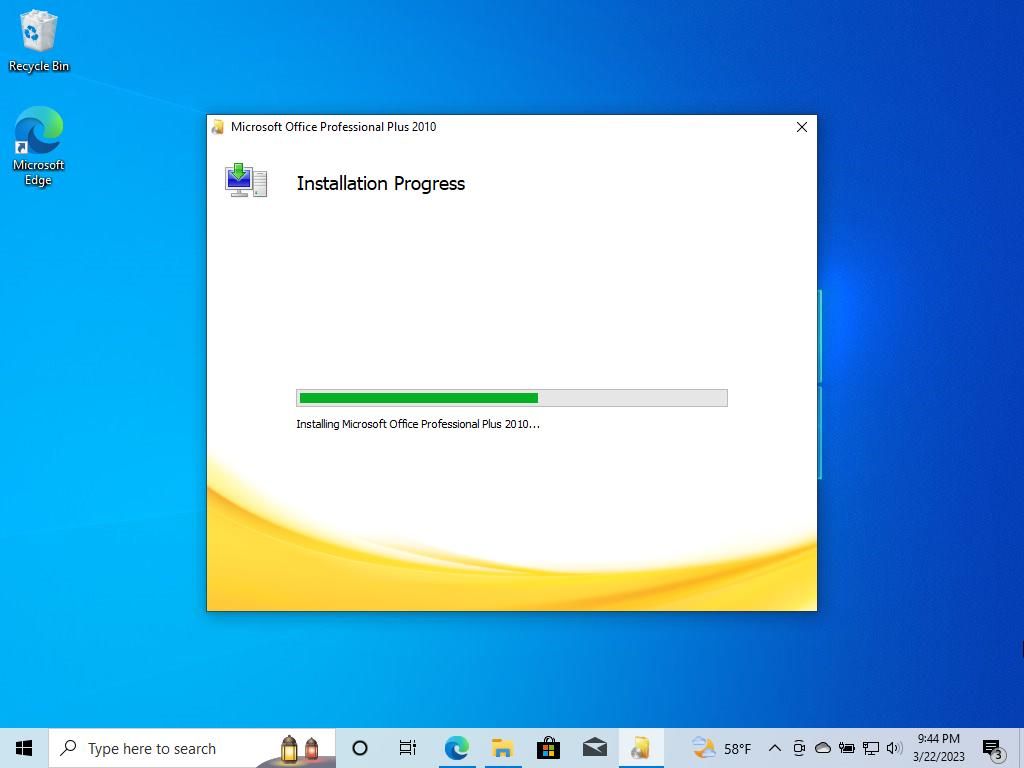
- Wait a few minutes while Office installs.
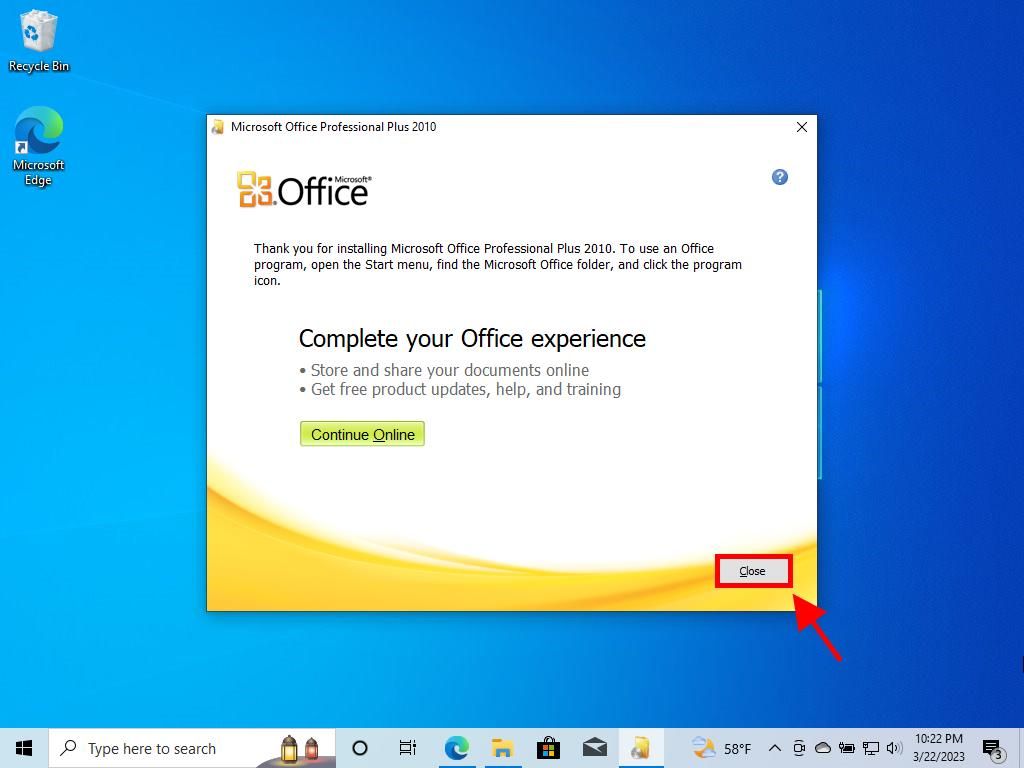
- Next, click on Close.
- A message will appear asking you to restart your PC. Close all open windows and click on Yes.
- After restarting your device, you will have Office 2010 installed and activated.


Process to install Office 2010 on Windows 7 and 8
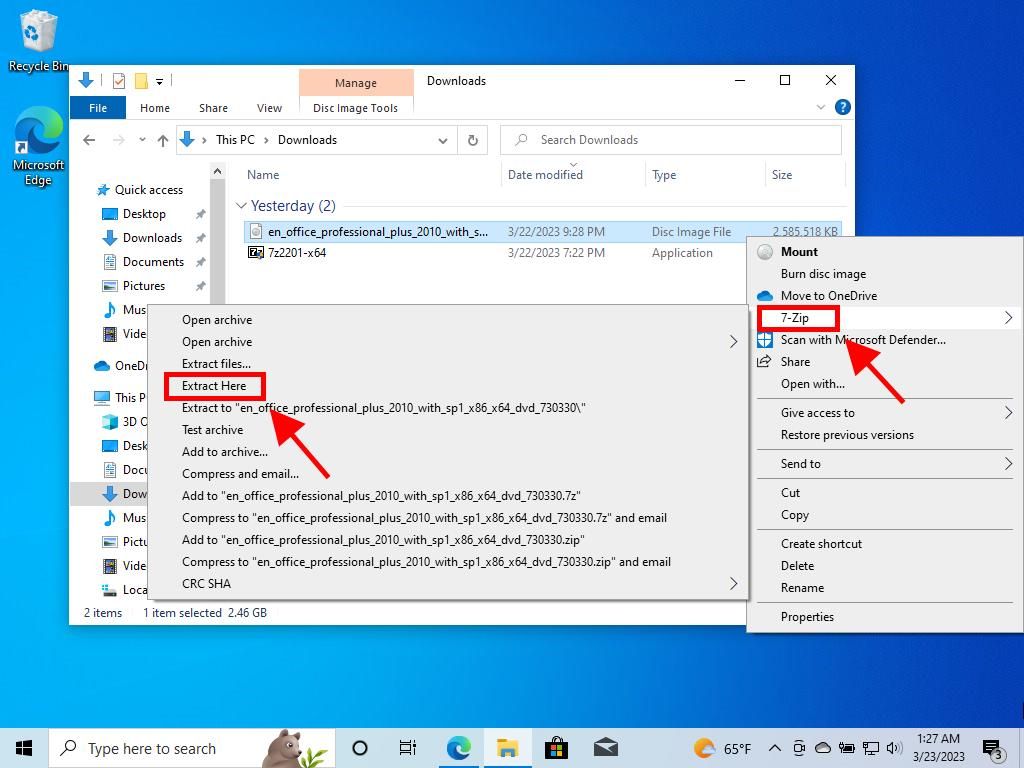
Note: To install and activate Office 2013 on Windows 7 and 8, you need to have a file compression programme installed on your PC. This can be WinRAR, WinZip or 7-Zip. In this guide, we will use 7-Zip.
- Once you have downloaded the Office 2010 .iso file, locate the file and right-click on it. Select 7-Zip and click on Extract here.
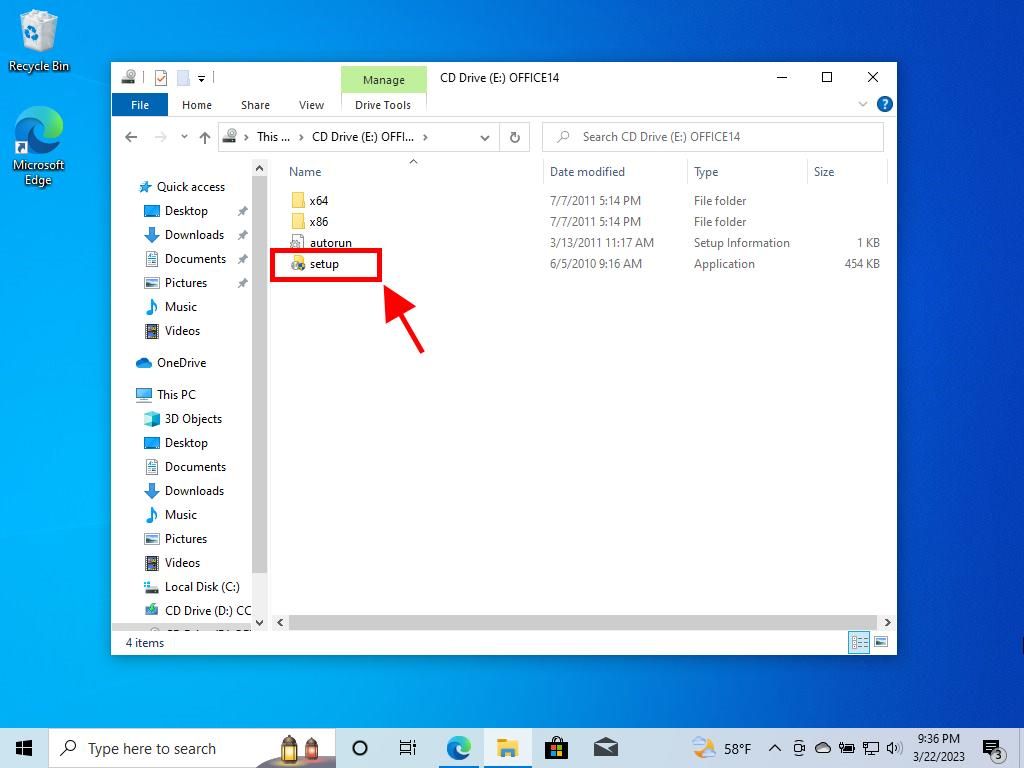
- After the file has been extracted, at the bottom of the window, double-click on the setup file.
- Enter your Office product key and click Continue.
- Tick the box to accept the terms and conditions and click Continue.
- Click on Install now.
- Wait a few minutes while Office installs.
- Next, click on Close, and you will have Office 2010 installed.